Tuesday, December 27, 2016

A Christmas Outfit

Just a quick post today with some photos of an outfit I put together this past weekend. My camera wasn't working properly so I had to use my phone. Not the best quality but ah well.


I admit, I felt a little silly taking selfies in the driveway but that's what you have to do when you don't have anyone to take pictures for you!


One of the few vintage coats I own, this 1950s princess coat is great for cooler weather. I love the longer length. I have a fur collar that can easily be added to dress it up if I want. The bright red hat was a purchase this fall from Mode de Lis during her hat sale. I thought the bright red color would be perfect for a Christmas-y outfit. The veil is in rough shape so at some point I will remove it, not sure if I will replace it or leave the hat plain. Thoughts?

Because I was going with a Christmas theme, I decide to try my Victory Red lipstick from Besame. I'm not totally sold on the color, which in person seam a little more pink on me. And it is bright! If you are looking for a super bright red you might like it but personally I like the Red Velvet better. It also doesn't stain your lips as much as the Victory Red does. It must have something to do with the formula because I don't have that problem with any other colors.

I also wore some red gloves, a plaid scarf that matches my bag and a big shiny rhinestone pin. All thrift store finds from over the years. Under my coat I wore my red and white 1940s pinafore. My red Bakelite earrings came from Brighter Bakelite on Etsy.


The boots I'm wearing are actually overshoes! They are trimmed with fur and are so much fun to wear. Some of you might remember them from this winter post.


That's for now! I hope everyone had a wonderful Christmas and that Santa brought you some lovely new vintage to enjoy! Watch for the second half of my 2016 events recap post this week.


Outfit Details
Hate - Mode de Lis
Gloves, pin, purse - Thrifted
Earrings - Brighter Bakelite
Over shoes - Ebay

Tuesday, November 29, 2016

How to Make a 1930s Bed Jacket

Now that the colder weather is upon us, I find myself changing over the wardrobe to warmer clothing. Out come the sweaters and wool pants! We held off turning the furnace on for as long as possible but finally caved near the end of October. The "heating season" in New England is rather long and as a true Yankee I typically willing to add an extra layer if it means saving a little on the heating bill. :)

In the spirit of Giving Tuesday I thought I would share a free pattern that I came across awhile back. Originally posted on Sewing Vintage, this is a pattern for making a lovely little 1930s bed jacket. 

If you use the pattern I would love to see how it turns out! Enjoy!


Tuesday, November 1, 2016

The Enchanting Rose Teacup Exchange

I was very excited to participate in this year's teacup exchange hosted by Stephanie of the blog The Enchanting Rose. While Stephanie has hosted this exchange, which also included mugs, many times before this was the first time I was able to take part. I learned about this awesome idea last year but was too late to join.


Each person taking part was asked to fill out a quick questioner with some basic info in order for Stephanie to pair us up. Along with our teacup, or mug, we were asked to include a friendly note, tea or coffee and a little something extra. The idea of the exchange is the opportunity to connect with like-minded people and, hopefully, create new friendships. I like that in organizing the exchange, Stephanie made sure that we each sent and received packages from different people. More ways to connect with different people!


I couldn't believe my luck when finding out who I would be sending a teacup to! Esther, and her lovely blog Dolly Creates, is where I was first introduced to the teacup and mug exchange! :) Esther and I have collaborated before, she wrote a great guest post here, so I was thrilled to be able to send her something! I didn't take any pictures of the goodies before I sent them off but I'm sure Esther will be sharing them at some point on her blog.

Oddly enough, the lovely lady I received my teacup from was also someone I was familiar with! What are the chances, given that 198 people signed up for the exchange?! Some of you may know Sara as well through her website Ensembles of the Past or her etsy shop and Facebook page of the same name. We 'met' online last year through one of the many historical clothing FB pages and have chatted off and on since. Sara creates beautiful custom-made historical clothing. Although I have never seen her work in person, judging from the gorgeous photos on her website, and lovely card included in my package, I'd say say her work is pretty outstanding!

Here are some photos of the teacup and other items Sara included. The gold trimmed teacup makes a nice addition to my collection! As some of you know, I used teacups as favors for my vintage themed wedding and because we collected sooooo many, I was able to keep a few. I have them on display in my pantry.


Thanks so much Stephanie for organizing this awesome exchange! And to Sara for your thoughtful gifts! You can check out the BIG REVEAL of all the teacups and mugs as well as the blogger link-up of all the gifts on The Enchanting Rose. I look forward to participating again next year!

Tuesday, September 20, 2016

Roaring 20s Lawn Party - Pt 2, the Dress

I made my dress for the Roaring 20s Lawn Party from this 1930s pattern. Yes, I made and wore a 1930s dress for a 1920s event, I'm such as rebel! I love the 20s, I really do! But I'm not super excited about how I look in most 20s dresses. I'm short with wider hips and those boxy dropped waist styles just feel frumpy and odd to me. I just need to find the right dress/style to suit my body type.

1930s Simplicity sewing pattern

Anyway, after pulling out a few patterns and sketching a few different design ideas, I realized I just didn't want to make a 1920s dress. As I prepared for the Art Deco weekend earlier this spring it occurred to me that my vintage wardrobe was seriously lacking items from the 1930s. OK, I've made a few late 30s pieces but they have more of that 40s/WWII vibe to them. I didn't have anything that screamed 30s and was really wanted too change that.


Enter Simplicity 1945. This pattern was among the very first vintage patterns I purchased a few years back when I became interested in vintage sewing. It might have come from Ebay but I can't remember now.

1930s Simplicity sewing pattern

As the lawn party would be in August I knew it would be hot. Having something that would be light and comfortable to wear and move around it was key. I think it was the sleeves of this dress that really sold it for me. And this deco style cotton (from the stash, whoowhoo!) was perfect for it. I traded some of this fabric with another vintage blogger recently. Really excited to see what she creates with it!


The simplicity of this pattern (no pun intended!) surprised me too. I think one of the reasons I had not attempted this pattern before was believing it would be too complicated. Turns out, it was one of the easiest  vintage dresses I've sewn and it went together fast!

The bodice is constructed of a front and back piece, both cut on the fold. The sleeves are cut in one with the bodice with seams across the shoulders and at the sides. Before sewing these pieces together a series of 1/4" tucks are stitched across the front and back. The perforations of the pattern pieces were a little wonky so I remarked my fabric to avoid wonky pleats.


The skirt is pretty straight forward with small darts at the back. The waist seams of the bodice and skirt are lapped and then top stitched in place. The dress closes with a side placket and snaps.
I finally got to use one of the special attachments for my sewing machine. This foot creates a nice rolled hem which is how I finished the edges of the sleeves.


Since I had a bunch of metal grommets kicking around I opted to use those instead of sewing eyelets for the front lacing. I also only added about half the number because I didn't think I would like the dress as much if it laced all the way down the front. Lacking proper ribbon I used a piece of navy blue rayon bias tape.


I had planned on wearing my navy blue suede 1930s shoes with this but opted for a pair of modern sandals because the ground was still a little wet. The red celluloid buckle is from my stash.

Even though I was a vendor at the lawn party, Cori and I were able to escape for a little bit while some friends watched my booth. (Thanks again Heather and Devon!) The gardens at the Crane Estate were in full bloom and made a wonderful backdrop for some photos.


Some of you might recognize my hair flowers. They are the ones I friend Monica made me for my wedding. I had attempted to reblock a hat for the event but it didn't turn out very well so I opted for the hair flowers instead to tie the outfit together. Plus it was nice to wear something from my wedding again. :)


Outfit Details
Dress - Made by Me
Hair Flowers - Made for my wedding by my friend Monica
Shoes - Thrifted

Pattern - Simplicity 1945
First Worn - July 31st
Complicated parts - Just marking sure the tucks on the bodice were straight and neat. The pattern perforations were a little off so I had to remark them.
Changes - I only needed to allow a little more room in the hips and shorten the skirt a few inches.
Cost - I don't remember what I paid for the pattern but I don't think it was more than $15 with shipping. Fabric and notions were all from the stash and the fabric was purchased on sale. I would estimate the total cost to be around $25 to $30.

Sunday, September 18, 2016

Roaring 20s Lawn Party - Pt 1

Another overdue post! I had such a wonderful time the GBVS's Roaring 20s Lawn Party back in July. This was the fourth year of the event. The weather looked rather uncertain in the days leading up to it but this year the organizers made the choice to hold it rain or shine. In the past there has been a rain date. Indeed the morning we drove to Ipswich it poured almost the whole drive there!

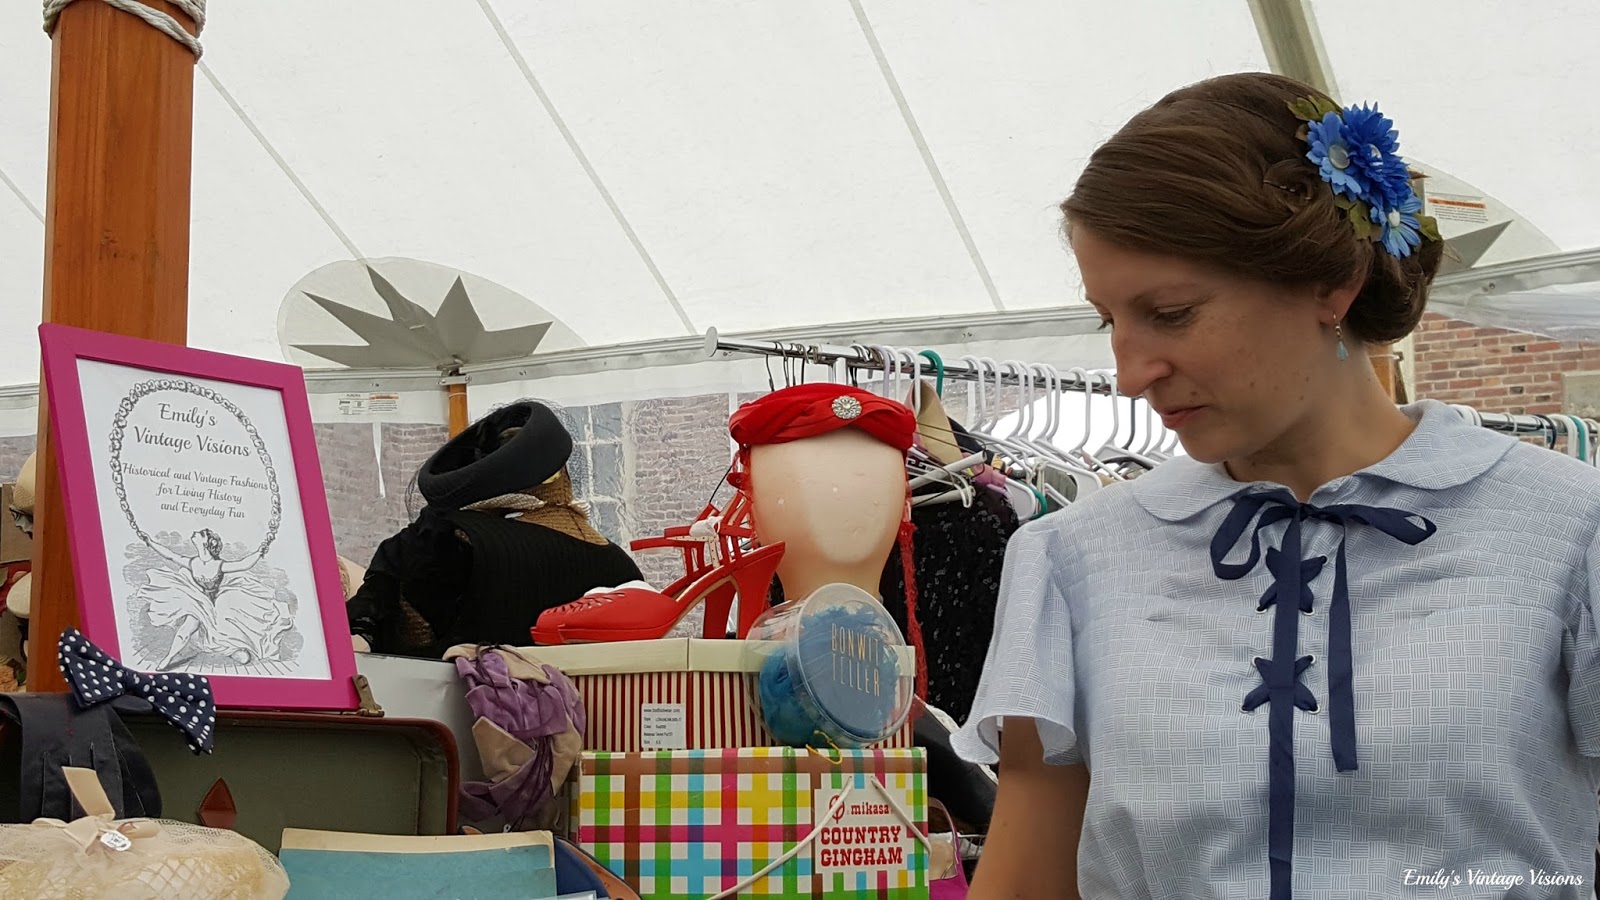
Fortunately the rain let up in time. This year there was a big tent set up over the dance floor and stage for the band. As a vendor I also had the good luck of being able to set up under an enormous tent that had been used for a wedding the day before. Complete with chandeliers!


I'll admit, it was a lot of work preparing for this but it was worth it. It's so great to be able to meet people and discuss things in person. I was able to catch up with friends and meet a few people who have been following my blog which is always a treat. This was my first big event as a vendor and I still have much to learn but it's a fun process. I would like to set things up a little differently if/when I do this again but overall I'm pretty happy with how things worked out.


I'm going to write up a separate post on the dress I made for this event so stay tuned for that in a day or two.


Related Posts Plugin for WordPress, Blogger...