Before you even think about refilling your vintage compact, you need to clean it. If there is any old makeup present, it can harbor dust, bacteria, and potential irritants. Yuck!! Use hot soapy water. Q-tips and small tooth brushes can be helpful to thoroughly clean the inside of your vintage compact. To sanitize your compact soak a cotton ball with rubbing alcohol and wipe the inside. Then rinse with warm water and set aside to dry.
Take care with certain vintage compacts as the mirrors can come loose and will need to be re-glued. Also some compacts have rhinestones or other special details or finished that should not be submerged in water. If that's the case you might want to consider refilling a different compact. However, if you are careful these can still be cleaned, refilled and enjoyed.
So, here is what you are going to need:
- Rubbing alcohol
- Loose powder or pressed powder in your choice of color
- Freshly cleaned vintage compact - Scrap of cheesecloth or linen fabric (optional)
- Small bowl to mix powder
- Butter knife or piece of stiff paper/card stock
- Small spoon
In a small, clean bowl, spoon in some loose powder or you can use a butter knife to scrape out your pressed powder from a modern compact.
Using a small spoon, slowly mix a little rubbing alcohol (about a cap full) with the powder until you form a creamy paste. Don't add too much liquid to start or you will end up with a soupy mess! It's better to add a tiny amount first and add more as needed. Be sure to smooth out any lumps as you mix.
Scoop the paste into vintage compact pan and gently press into place with the back of your spoon. Smooth out any irregularities with your knife or stiff paper/card stock. Be sure not to overfill your compact. Use a cotton ball or q-tip to clean up the edges of your compact.
This next step is optional but makes a nice finish to your powder. Take a scrap cheesecloth or linen fabric and gently press over the compact. Remove. The cloth will create a nice surface look and help smooth powder.
Keep the compact open and allow to dry overnight. Before attempting to use your newly filled vintage compact, make sure the surface is dry by wiping a finger across it. When the compact is ready to use it should feel 'powdery' and smooth.
That's it!

Showing posts with label Vintage. Show all posts
Showing posts with label Vintage. Show all posts
Friday, July 31, 2020

Friday, December 8, 2017
Holiday Decor - Vintage Tree Bling
Tired of using the the same Christmas ornaments year after year?
Looking for something different and unique for your holiday decor? How
about tree ornaments made from vintage jewelry! This is something I've
wanted to do for a while and this year I finally did it! I used my
collection of sparkly vintage odds and ends to decorate a table top
tree. You can do the same!


Here is what you will need. It's handy to keep a list of the items you hang on the tree, specially if you are using small items like earrings. That way you wont loose anything.


Have fun with this and don't be afraid to mix in some
modern pieces as well. My little tree looks so pretty at night. Sadly
my camera doesn't take very good pictures in low light but it's so
sparkly! :)
Stay tuned for another post this week about vintage holiday decor! I can't wait to share with everyone how I decorated my fireplace mantel.

Here is what you will need. It's handy to keep a list of the items you hang on the tree, specially if you are using small items like earrings. That way you wont loose anything.
- Christmas tree (I should note that I use a small fake tree for this so there was no fear of pine pitch. No vintage was harmed!)
- Christmas Lights
- Scissors
- Ribbon
- Assortment of vintage jewelry and sparkly bits
Most
of the items shown here came in one large box lot from and antique shop
several years ago. Many of the pieces I've picked up over the years are
missing stones or are damaged in some way so I got a really good deal
on them. But that's OK because you don't notice the flaws once they are
on the tree. :) Keep your eyes open at yard sales, flea markets, etc.
and you will find some good deals. One thing I sometimes see at antique
shops are mason jars full of beaded
necklaces and other odds and ends of mis-matched jewelry. That would be
perfect for a project like this. I've found some nice non-vintage
pieces at thrift stores too like the cat pin seen in this post. My favorite victory pin (the large V with rhinestones) is even hanging on the tree!
Here is what you do.

 I've been collecting 1950s/60s rhinestone necklaces for a long time and these
look especially pretty draped across the branches. I find them
everywhere and have to stop myself from buying them all lol! Prices vary but on average I never pay more then $10 or $12 for a
necklace. Often they are less then that. Occasionally I will splurge on a nicer piece like the one I wore for
my wedding. Or blue and white one seen below that came with matching
earrings.
I've been collecting 1950s/60s rhinestone necklaces for a long time and these
look especially pretty draped across the branches. I find them
everywhere and have to stop myself from buying them all lol! Prices vary but on average I never pay more then $10 or $12 for a
necklace. Often they are less then that. Occasionally I will splurge on a nicer piece like the one I wore for
my wedding. Or blue and white one seen below that came with matching
earrings.
Dress clips, shoe clips, and earrings can be clipped
to the branches. Tip! With a fake tree you can bend the ends of the
branches so these little pieces sit just right.
Here is what you do.
- After selecting your vintage pin, cut a piece of ribbon 5-6 inches in length (longer if desired)
- Thread the ribbon through the back of the pin. Even out the ends of the ribbon and tie a knot leaving a small tail.
- Use your scissors to curl the ends of your ribbon OR tie the ends in a pretty little bow
- Place your ornament on your tree and you're done!
I've been collecting 1950s/60s rhinestone necklaces for a long time and these
look especially pretty draped across the branches. I find them
everywhere and have to stop myself from buying them all lol! Prices vary but on average I never pay more then $10 or $12 for a
necklace. Often they are less then that. Occasionally I will splurge on a nicer piece like the one I wore for
my wedding. Or blue and white one seen below that came with matching
earrings.  |
| The rhinestone necklaces like those at the upper right are commonly found at antique shops. The necklace and bracelet at the bottom right I wore for my wedding. |
 |
| Vintage Dress Clip Tree Ornaments |
 |
| Vintage earrings make lovely ornaments too! The pink pair are from the Etsy shop of Chronically Vintage. Thank you Jessica! |
Stay tuned for another post this week about vintage holiday decor! I can't wait to share with everyone how I decorated my fireplace mantel.
Tuesday, December 27, 2016
A Christmas Outfit
Just a quick post today with some photos of an outfit I put together this past weekend. My camera wasn't working properly so I had to use my phone. Not the best quality but ah well.


I admit, I felt a little silly taking selfies in the driveway but that's what you have to do when you don't have anyone to take pictures for you!


One of the few vintage coats I own, this 1950s princess coat is great for cooler weather. I love the longer length. I have a fur collar that can easily be added to dress it up if I want. The bright red hat was a purchase this fall from Mode de Lis during her hat sale. I thought the bright red color would be perfect for a Christmas-y outfit. The veil is in rough shape so at some point I will remove it, not sure if I will replace it or leave the hat plain. Thoughts?
Because I was going with a Christmas theme, I decide to try my Victory Red lipstick from Besame. I'm not totally sold on the color, which in person seam a little more pink on me. And it is bright! If you are looking for a super bright red you might like it but personally I like the Red Velvet better. It also doesn't stain your lips as much as the Victory Red does. It must have something to do with the formula because I don't have that problem with any other colors.
I also wore some red gloves, a plaid scarf that matches my bag and a big shiny rhinestone pin. All thrift store finds from over the years. Under my coat I wore my red and white 1940s pinafore. My red Bakelite earrings came from Brighter Bakelite on Etsy.


The boots I'm wearing are actually overshoes! They are trimmed with fur and are so much fun to wear. Some of you might remember them from this winter post.

That's for now! I hope everyone had a wonderful Christmas and that Santa brought you some lovely new vintage to enjoy! Watch for the second half of my 2016 events recap post this week.


I admit, I felt a little silly taking selfies in the driveway but that's what you have to do when you don't have anyone to take pictures for you!


One of the few vintage coats I own, this 1950s princess coat is great for cooler weather. I love the longer length. I have a fur collar that can easily be added to dress it up if I want. The bright red hat was a purchase this fall from Mode de Lis during her hat sale. I thought the bright red color would be perfect for a Christmas-y outfit. The veil is in rough shape so at some point I will remove it, not sure if I will replace it or leave the hat plain. Thoughts?
Because I was going with a Christmas theme, I decide to try my Victory Red lipstick from Besame. I'm not totally sold on the color, which in person seam a little more pink on me. And it is bright! If you are looking for a super bright red you might like it but personally I like the Red Velvet better. It also doesn't stain your lips as much as the Victory Red does. It must have something to do with the formula because I don't have that problem with any other colors.
I also wore some red gloves, a plaid scarf that matches my bag and a big shiny rhinestone pin. All thrift store finds from over the years. Under my coat I wore my red and white 1940s pinafore. My red Bakelite earrings came from Brighter Bakelite on Etsy.


The boots I'm wearing are actually overshoes! They are trimmed with fur and are so much fun to wear. Some of you might remember them from this winter post.

That's for now! I hope everyone had a wonderful Christmas and that Santa brought you some lovely new vintage to enjoy! Watch for the second half of my 2016 events recap post this week.

Outfit Details
Coat - Who is Sylvia?
Hate - Mode de Lis
Gloves, pin, purse - Thrifted
Earrings - Brighter Bakelite
Earrings - Brighter Bakelite
Over shoes - Ebay
Tuesday, November 1, 2016
The Enchanting Rose Teacup Exchange
I was very excited to participate in this year's teacup exchange hosted by Stephanie of the blog The Enchanting Rose. While Stephanie has hosted this exchange, which also included mugs, many times before this was the first time I was able to take part. I learned about this awesome idea last year but was too late to join.

Each person taking part was asked to fill out a quick questioner with some basic info in order for Stephanie to pair us up. Along with our teacup, or mug, we were asked to include a friendly note, tea or coffee and a little something extra. The idea of the exchange is the opportunity to connect with like-minded people and, hopefully, create new friendships. I like that in organizing the exchange, Stephanie made sure that we each sent and received packages from different people. More ways to connect with different people!


I couldn't believe my luck when finding out who I would be sending a teacup to! Esther, and her lovely blog Dolly Creates, is where I was first introduced to the teacup and mug exchange! :) Esther and I have collaborated before, she wrote a great guest post here, so I was thrilled to be able to send her something! I didn't take any pictures of the goodies before I sent them off but I'm sure Esther will be sharing them at some point on her blog.
Oddly enough, the lovely lady I received my teacup from was also someone I was familiar with! What are the chances, given that 198 people signed up for the exchange?! Some of you may know Sara as well through her website Ensembles of the Past or her etsy shop and Facebook page of the same name. We 'met' online last year through one of the many historical clothing FB pages and have chatted off and on since. Sara creates beautiful custom-made historical clothing. Although I have never seen her work in person, judging from the gorgeous photos on her website, and lovely card included in my package, I'd say say her work is pretty outstanding!
Here are some photos of the teacup and other items Sara included. The gold trimmed teacup makes a nice addition to my collection! As some of you know, I used teacups as favors for my vintage themed wedding and because we collected sooooo many, I was able to keep a few. I have them on display in my pantry.


Thanks so much Stephanie for organizing this awesome exchange! And to Sara for your thoughtful gifts! You can check out the BIG REVEAL of all the teacups and mugs as well as the blogger link-up of all the gifts on The Enchanting Rose. I look forward to participating again next year!

Each person taking part was asked to fill out a quick questioner with some basic info in order for Stephanie to pair us up. Along with our teacup, or mug, we were asked to include a friendly note, tea or coffee and a little something extra. The idea of the exchange is the opportunity to connect with like-minded people and, hopefully, create new friendships. I like that in organizing the exchange, Stephanie made sure that we each sent and received packages from different people. More ways to connect with different people!


I couldn't believe my luck when finding out who I would be sending a teacup to! Esther, and her lovely blog Dolly Creates, is where I was first introduced to the teacup and mug exchange! :) Esther and I have collaborated before, she wrote a great guest post here, so I was thrilled to be able to send her something! I didn't take any pictures of the goodies before I sent them off but I'm sure Esther will be sharing them at some point on her blog.
Oddly enough, the lovely lady I received my teacup from was also someone I was familiar with! What are the chances, given that 198 people signed up for the exchange?! Some of you may know Sara as well through her website Ensembles of the Past or her etsy shop and Facebook page of the same name. We 'met' online last year through one of the many historical clothing FB pages and have chatted off and on since. Sara creates beautiful custom-made historical clothing. Although I have never seen her work in person, judging from the gorgeous photos on her website, and lovely card included in my package, I'd say say her work is pretty outstanding!
Here are some photos of the teacup and other items Sara included. The gold trimmed teacup makes a nice addition to my collection! As some of you know, I used teacups as favors for my vintage themed wedding and because we collected sooooo many, I was able to keep a few. I have them on display in my pantry.


Thanks so much Stephanie for organizing this awesome exchange! And to Sara for your thoughtful gifts! You can check out the BIG REVEAL of all the teacups and mugs as well as the blogger link-up of all the gifts on The Enchanting Rose. I look forward to participating again next year!
Sunday, July 10, 2016
Sunday Shoe Spectacle - Fitting Shoes
Thanks so much for the tremendous feedback on my 1940s beachwear post. I'll have another post coming later this week about the location where the photos were taken.
But now, welcome to another of Sunday Shoe Spectacle! Today I have some tips on shopping for and fitting vintage shoes. This is a revival of a post a wrote back in 2012 when I first started blogging.
- Are you looking for a particular style to meet the requirements of a particular period of time? And if so, what style? Be sure to do your homework so you know what you are looking at when you start shopping. Many sellers are very knowledgeable but sometimes dates and style names can be listed incorrectly.
- How often do you plan to wear the shoes? If you want a pair of shoes to wear every day, vintage might not be the way to go. But for special occasions, a day in the office, or a night out with the girls or certain types of reenactments they might be just the thing.
- What condition issues should you look for (and avoid) when shopping for vintage shoes? Cracking, scuffs, worn out insoles, broken straps, etc. Avoid leather that looks and feels brittle. Some issues can be fixed with a bit of leather conditioning or polish while other can not.
- What about the details? Heel height, pretty details like bows or buckles.
- And most importantly, how do you know what size shoe to buy?
So how do you know what size vintage shoes to buy?


It's true that shoe sizes haven't changed too much over the years, unlike clothing sizes. A size 7 vintage shoe, for example, will be roughly the same size as a modern size 7. As a general rule, dress shoes do run a little narrow. And this is especially true of most vintage shoes the market today, so you will want to keep that in mind if you have wide feet like I do. If you have the option of trying a pair of shoes on before you buy them, excellent. But when shopping online, obviously you won't be able to. Keep in mind that the majority of online shop owners will not except returns for shoes that don't fit properly. Don't be afraid to ask for more information!
So, to avoid heartaches and headaches alike and know your measurements!


To figure out your measurements - Stand on a piece of paper and have a friend trace the outline of your foot. Take a measuring tape and measure length of your foot from the tip of your big toe to your heel, then across the ball, or widest part of your foot. Check out this helpful video
Shopper's Tips - To ensure a good fit, measure of a pair of your own comfortable shoes across the ball of the foot (the widest point), and from toe to heel. Take both of these measurements on the inside on the shoes. A flexible ruler is helpful. Compare these measurements to those of the vintage shoes you think you want to purchase. It's a good idea to measure a pair of shoes that have the same heel height as the pair you're shopping for. If you like your shoes to fit snug or a little on the loose side, take that onto account.
Condition issues - As with any article of vintage clothing, whether it's a hat, a dress, or a pair of shoes, expect some kind of wear. Occasionally you will see NOS - new old stock, or "dead stock" - items in near mint condition. Excellent condition can mean a higher price.
When looking for shoes, take a look first at the soles and then the heels. If no pictures are provided ask to see some so you can see how much wear there is. Check for cracks or other flaws to the soles and heels. If you plan on wearing them for more then the occasional photo shoot this is important. You want to make sure the shoes are sturdy and safe to wear. Worn out insoles can easily be replaced. Scuff marks are no big deal but if there is cracking anywhere on the shoes that could be a problem, particularly with leather shoes as they can become brittle with age. Leather conditioners can help but in some cases the shoes may be beyond repair. Check the buckles (if there are any) and other details such as the stitching or decorative bows to make sure they are secure.
Ask yourself - If there are flaws, can you live with them, considering the age of the shoes of course? Can they easily be fixed? (A bit of polish or leather conditioner, new insoles, etc.) Is it worth the extra cost to have them fixed? If you answer "No" to any of these questions you should probably keep looking.
When in doubt, ask for help!
Don't be afraid to ask questions. When looking for vintage shoes online, I found the way shoes measurement were listed to be a little inconsistent, at least on Etsy. One shop will measure the widest point on the inside of the shoes and other shop across the bottom. Once I knew what I needed for my own measurements, I asked shop owners to clarify how their measurements were taken. Each and every person was extremely help I must say!
Remember, the hunt for the perfect pair of shoes is all part of the fun! :) I hope you find this post helpful.
But now, welcome to another of Sunday Shoe Spectacle! Today I have some tips on shopping for and fitting vintage shoes. This is a revival of a post a wrote back in 2012 when I first started blogging.
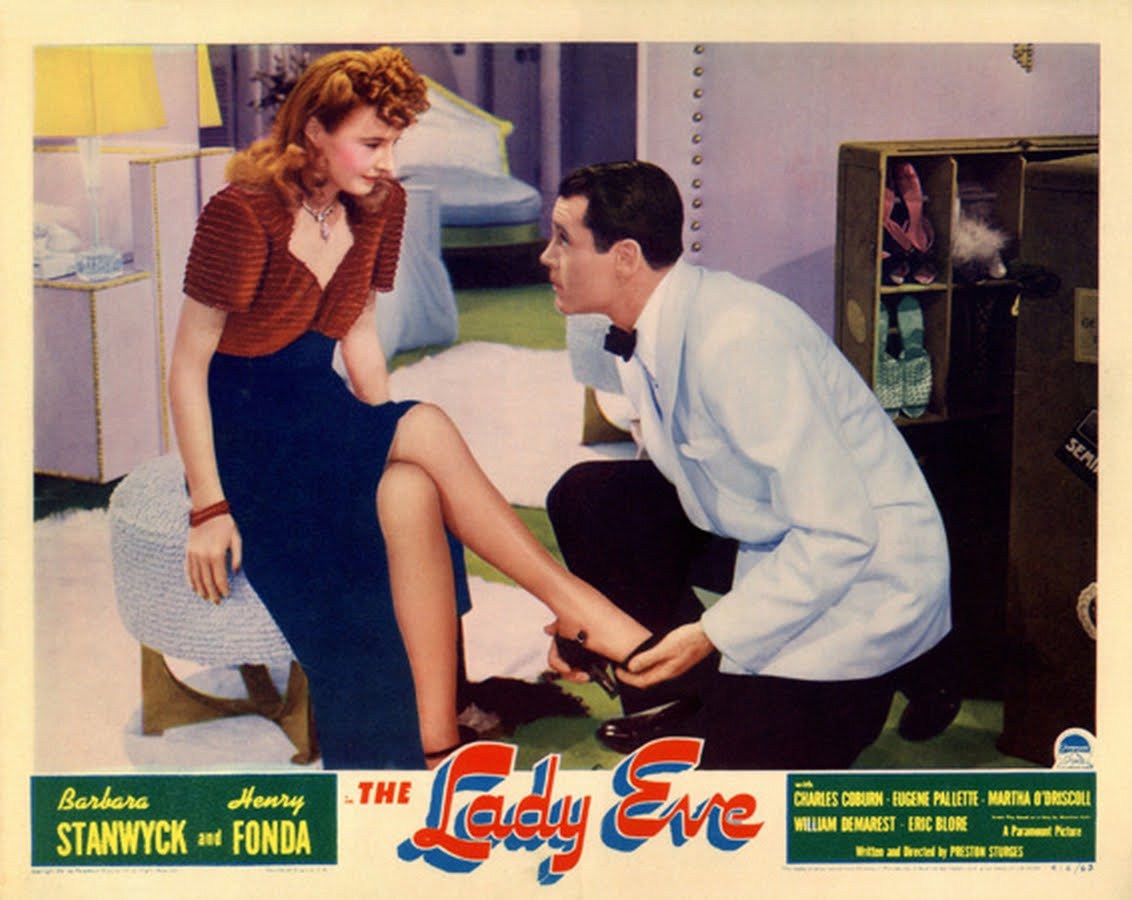 |
| The Lady Eve - Glamourdaze |
- How often do you plan to wear the shoes? If you want a pair of shoes to wear every day, vintage might not be the way to go. But for special occasions, a day in the office, or a night out with the girls or certain types of reenactments they might be just the thing.
- What condition issues should you look for (and avoid) when shopping for vintage shoes? Cracking, scuffs, worn out insoles, broken straps, etc. Avoid leather that looks and feels brittle. Some issues can be fixed with a bit of leather conditioning or polish while other can not.
- What about the details? Heel height, pretty details like bows or buckles.
- And most importantly, how do you know what size shoe to buy?
So how do you know what size vintage shoes to buy?


It's true that shoe sizes haven't changed too much over the years, unlike clothing sizes. A size 7 vintage shoe, for example, will be roughly the same size as a modern size 7. As a general rule, dress shoes do run a little narrow. And this is especially true of most vintage shoes the market today, so you will want to keep that in mind if you have wide feet like I do. If you have the option of trying a pair of shoes on before you buy them, excellent. But when shopping online, obviously you won't be able to. Keep in mind that the majority of online shop owners will not except returns for shoes that don't fit properly. Don't be afraid to ask for more information!
So, to avoid heartaches and headaches alike and know your measurements!


To figure out your measurements - Stand on a piece of paper and have a friend trace the outline of your foot. Take a measuring tape and measure length of your foot from the tip of your big toe to your heel, then across the ball, or widest part of your foot. Check out this helpful video
Shopper's Tips - To ensure a good fit, measure of a pair of your own comfortable shoes across the ball of the foot (the widest point), and from toe to heel. Take both of these measurements on the inside on the shoes. A flexible ruler is helpful. Compare these measurements to those of the vintage shoes you think you want to purchase. It's a good idea to measure a pair of shoes that have the same heel height as the pair you're shopping for. If you like your shoes to fit snug or a little on the loose side, take that onto account.
Condition issues - As with any article of vintage clothing, whether it's a hat, a dress, or a pair of shoes, expect some kind of wear. Occasionally you will see NOS - new old stock, or "dead stock" - items in near mint condition. Excellent condition can mean a higher price.
When looking for shoes, take a look first at the soles and then the heels. If no pictures are provided ask to see some so you can see how much wear there is. Check for cracks or other flaws to the soles and heels. If you plan on wearing them for more then the occasional photo shoot this is important. You want to make sure the shoes are sturdy and safe to wear. Worn out insoles can easily be replaced. Scuff marks are no big deal but if there is cracking anywhere on the shoes that could be a problem, particularly with leather shoes as they can become brittle with age. Leather conditioners can help but in some cases the shoes may be beyond repair. Check the buckles (if there are any) and other details such as the stitching or decorative bows to make sure they are secure.
Ask yourself - If there are flaws, can you live with them, considering the age of the shoes of course? Can they easily be fixed? (A bit of polish or leather conditioner, new insoles, etc.) Is it worth the extra cost to have them fixed? If you answer "No" to any of these questions you should probably keep looking.
When in doubt, ask for help!
Don't be afraid to ask questions. When looking for vintage shoes online, I found the way shoes measurement were listed to be a little inconsistent, at least on Etsy. One shop will measure the widest point on the inside of the shoes and other shop across the bottom. Once I knew what I needed for my own measurements, I asked shop owners to clarify how their measurements were taken. Each and every person was extremely help I must say!
Remember, the hunt for the perfect pair of shoes is all part of the fun! :) I hope you find this post helpful.
 |
| Vintage Ad Browser |
 |
| Vintage Ad Browser |
Wednesday, March 9, 2016
A 1940s Sewing Challenge
Hello everyone! I hope your day is going well for you all. First up, I'd like to thank you all for your feedback on my very first video post. It was certainly a new challenge for me but fun to create. My editing skills need work but that's alright. I'll figure things out as I go. If you missed it you can find the video here, and don't forget to subscribe to my YouTube channel. I have loads of ideas for future posts. If you have suggestions for a video post please let me know.
I also look forward to meeting some of you at the White Lightning Ball this weekend. You can check some of the vintage goodies I'll be bringing here.
Now, who's up for a 1940s sewing challenge? Alexandra of EvaDress is hosting a sewing challenge that will focus on tailored garments of the 1940s using using any original, reproduction or multi-size patterns from EvaDress Patterns.
The contest will begin on March 21, 2016 and closes at midnight EST on June 1, 2016. You are not allowed to start your project before March 21, although you are allowed to create a muslin to test the fit of your pattern.
I am very excited to be helping Alexandra out as a guest juror for this contest! It's going to be so much fun! Yeah!! Entries will be judged on the quality of construction, overall design and how closely they have followed the pattern and contest guidelines. The top finalist will receive a $100 gift certificate to EvaDress.com!
Here are a few of my favorite patterns from EvaDress.
To join the EvaDress 'Fitting 40's sewing challenge simply visit the challenge group on FaceBook
, click join and then submit your project for consideration. When posting photos of your finished project be sure to including the front, back, side views and any construction/design details in the
comments section under your main photo. Tell us a little about your project. And don't forget to let us know which EvaDress pattern you used.
The top finalist will be notified on the event wall by 11:59p.m. EST, June 3, 2016. Good luck to everyone!
I also look forward to meeting some of you at the White Lightning Ball this weekend. You can check some of the vintage goodies I'll be bringing here.
Now, who's up for a 1940s sewing challenge? Alexandra of EvaDress is hosting a sewing challenge that will focus on tailored garments of the 1940s using using any original, reproduction or multi-size patterns from EvaDress Patterns.
 |
| EvaDress Patterns "Fitting 40s" Sewing Challenge |
The contest will begin on March 21, 2016 and closes at midnight EST on June 1, 2016. You are not allowed to start your project before March 21, although you are allowed to create a muslin to test the fit of your pattern.
I am very excited to be helping Alexandra out as a guest juror for this contest! It's going to be so much fun! Yeah!! Entries will be judged on the quality of construction, overall design and how closely they have followed the pattern and contest guidelines. The top finalist will receive a $100 gift certificate to EvaDress.com!
 |
| SE40-210 1940s Suit and Blouse |
 |
| D40-5087, 1940 Dresses |
 |
| C40-3969, 1940's Men's Jackets |
The top finalist will be notified on the event wall by 11:59p.m. EST, June 3, 2016. Good luck to everyone!
Tuesday, February 16, 2016
My First Video Post!
Hello there! Today is a first for my little blog. I have for you my first ever video post! I thought I would post a combination welcome and Q&A to start off. I have several ideas for future video posts, but I need to work on my editing skills first. This first video is a little longer then I thought it would be and I didn't get to answer all the questions you sent. But that's OK, I will have them for another post. Feel free send more questions! What would you like to know about me?

I would love to get your feedback! If you have tips for making videos I would love to hear those too. As I said, this was my first time creating a video post and I know I still have a lot to learn! Enjoy!
Subscribe to my YouTube channel and never miss a video post!

I would love to get your feedback! If you have tips for making videos I would love to hear those too. As I said, this was my first time creating a video post and I know I still have a lot to learn! Enjoy!
Subscribe to my YouTube channel and never miss a video post!
Thursday, December 24, 2015
A Little Vintage Decor for Christmas
Hello again! My goodness, is it really Christmas Eve already?!?! It's hard to be in a festive mood when we have no snow! Ah well, I'm sure we will have some soon enough.

Today is a quick post. I wanted to show you some of my Christmas decorations. I was hoping to show you pictures of my Christmas skirt, but I'm still working on it. Hopefully I can get it finished in time to wear to the church service tonight!
I love that our living room has a fire place and mantel. There are some many options for decorating! I'm actually planning a post for early in the New Year to show you all the different ways I've dressed it up since we moved into our new house. Christmas of course is the best time for decoration in my opinion, and almost anything goes.

I used a mix of old and new things to decorate. Faux greens, lights and colored balls to start and then incorporated some vintage and antique items. Nestled among the greens are vintage hair combs, old photos and some hat boxes. I also placed a stack on hat boxes on the hearth. Don't worry, we're not actually using the fire place right now! The green glass insulators are great for placing over battery operated tea lights. Each year I pick up one or two new gift boxes. They are great for decorating as well for those who don't like wrapping gifts. It's great that they can be used over and over, cutting back on wasteful wrapping paper.

A box set of mother of pearl cuff links and shirt studs and a sparkly rhinestone purse complete the mantel decor for this year. I don't have any pictures of our little faux tree in the kitchen, but like last year I decorated it with vintage bits and bobs.


My outfit is a mix of old and new as well. The silk scarf and sweater are vintage, the skirt is me-made and the shoes are from Royal Vintage Shoes. (I will be writing a full review of them later on.) The one I made back in 2012 and was patterned from my 1940s brown suit, you've seen the suit a few times on my blog as it's a favorite of mine. The skirt was among my first attempts at taking a pattern from a vintage piece of clothing. The sweater is another favorite. It was part of a vintage sweater gold mine a found at a near by thrift store! Some one must have cleaned out grandma's closet because I purchased 5 fabulous vintage cashmere sweaters all in one swoop!


What do you think? Should I plan more vintage home decor posts for next year? I'd love to hear your ideas!
Well, that's all for now. Merry Christmas Everyone!! I hope Santa brings you everything on your wish list!


Today is a quick post. I wanted to show you some of my Christmas decorations. I was hoping to show you pictures of my Christmas skirt, but I'm still working on it. Hopefully I can get it finished in time to wear to the church service tonight!
I love that our living room has a fire place and mantel. There are some many options for decorating! I'm actually planning a post for early in the New Year to show you all the different ways I've dressed it up since we moved into our new house. Christmas of course is the best time for decoration in my opinion, and almost anything goes.
 |
| If you look closely you can see a geeky selection of DVDs. :) |

I used a mix of old and new things to decorate. Faux greens, lights and colored balls to start and then incorporated some vintage and antique items. Nestled among the greens are vintage hair combs, old photos and some hat boxes. I also placed a stack on hat boxes on the hearth. Don't worry, we're not actually using the fire place right now! The green glass insulators are great for placing over battery operated tea lights. Each year I pick up one or two new gift boxes. They are great for decorating as well for those who don't like wrapping gifts. It's great that they can be used over and over, cutting back on wasteful wrapping paper.

A box set of mother of pearl cuff links and shirt studs and a sparkly rhinestone purse complete the mantel decor for this year. I don't have any pictures of our little faux tree in the kitchen, but like last year I decorated it with vintage bits and bobs.


My outfit is a mix of old and new as well. The silk scarf and sweater are vintage, the skirt is me-made and the shoes are from Royal Vintage Shoes. (I will be writing a full review of them later on.) The one I made back in 2012 and was patterned from my 1940s brown suit, you've seen the suit a few times on my blog as it's a favorite of mine. The skirt was among my first attempts at taking a pattern from a vintage piece of clothing. The sweater is another favorite. It was part of a vintage sweater gold mine a found at a near by thrift store! Some one must have cleaned out grandma's closet because I purchased 5 fabulous vintage cashmere sweaters all in one swoop!


What do you think? Should I plan more vintage home decor posts for next year? I'd love to hear your ideas!
Well, that's all for now. Merry Christmas Everyone!! I hope Santa brings you everything on your wish list!

Outfit Details
Silk Scarf - Fort Anne Antiques
Sweater - Thrifted
Skirt - Made by me
Shoes - Royal Vintage Shoes
Silk Scarf - Fort Anne Antiques
Sweater - Thrifted
Skirt - Made by me
Shoes - Royal Vintage Shoes
Thursday, April 2, 2015
Color Recipes for Spring and a Vintage Photo Contest
Hello All! Today I bring you some fashion incite from 1939. As usual, while looking for something completely different, I stumbled across this interesting article from the Dallas Morning News. The author describes some new color trends for the coming spring. I think she must have had a regular fashion column because I've seen a few other articles by her. Here in New England we are still lacking color of any kind except of course the muddy white of slowly melting snow and brown grass. I found this article to be rather stimulating for the mind and now I can't stop thinking about all these wonderful color combinations! Navy and citron, moss green and apple blossom pink .... the list goes on.
So what's the contest you ask? Well, I thought it would be fun for those of us with a vintage wardrobe to go through our closets and put together an outfit with this article in mind! Then have a little photo contest! Use any of the color combination below or create your own for spring! Let's keep the date range 1930s and 1940s. Want to enter the challenge? Great! Leave me a comment below, then send me a photo of your outfit with a brief description. I will post them to an album on my Facebook page so everyone can see them as well as create a blog post. I will choose a winner and send them a special prize! This little contest is open to all readers, you don't need to have a blog but if you do let me know so I can link back to you. The deadline for the contest will be Sunday May 3rd. That gives you a whole month to mix and match! I'll announce the winner in early May.
-Please Note! I'm moving the deadline back to May 3rd to give
everyone a few more days. That also give me more time to put together
the prize. :) -
 |
| Please Note! The deadline for entering the contest is May 3rd |
The following text is from an article in the Dallas Morning News dated February 3, 1939.
Color Recipes Compiled from Fashion Shows. Dominating Note of Style Can Be Used in Many Combinations. By Alma Cunningham.
Color is everywhere. It's the dominating note of fashion. And it's used in new ways, new combinations. If you've never a doubt about what color to wear with what for that much desired chic, turn the page. Our color recipes, taken from outstanding ensembles of recent style shows, are for the likes of us who sometimes like to dabble in unusual color, who sometimes astound natives with our color consciousness, who always want to wear a color accent that is effective.
Assuming that your first purchases for spring will be a pair of shoes, a bag and hat to snatch your winter wardrobe from boredom, our color recipes start with at least one of these items already on hand. So.
 |
| Day Dress, 1939 FIDM Museum S2009.997.1 Source |


Public Wardrobe No. 1 - Frosted.
Navy is a long-time favorite every spring. Combined with white touches, you've got something. Our frosted ensemble required the following: With navy shoes and navy bag, a two-piece navy suit, white frilly blouse, white hat, white veil.
Navy and Wheat
(1) In the case of a navy coat, and navy shoes, gloves, hat veil, and a wheat print silk dress, wheat ascot and wheat bag.
(2) With a navy dress, shoes, bag and gloves, wear a wheat belt, hat, and topcoat.
(3) With a two-piece navy suit, navy shoes and bag, add a blouse in wheat, wheat gloves, and a natural color straw hat with spring flowers and a navy veil.
Navy and Red.
(1) If you prefer the lipstick red, choose a narrow leather belt, a shoulder bouquet, and a ribbon band for your hat in the red. Wear it with a navy skirt, a navy jacket with a white chalk stripe, navy sailor, navy shoes, bag and white gloves.
(2) If you prefer the bright red, wear a navy blue suit with polka-dot taffeta collar, navy straw hat with a white and bright red ribbon crown, navy shoes and bag, white gloves.
Navy With Cyclamen.
In navy - new low waistline dress, with a tiny high white collar, a silver buttons down the front of the waist; small hat and veil; shoes and bag. In Cyclamen - a large soft suede pouch type bag.
Navy with Citron.
Citron is that cool, line shade, in the palest of greenish yellows. A citron jacket or topper accents any all navy ensemble, smarty.
 |
| Image Source |
 |
| Image Source |
 |
| Image Source |
 |
| 1930s Two-tone Heels on Etsy |
Black Magic
The basis of many a spring wardrobe is a pair of black patent leather shoes and a bag. Fill in accordingly, and you've noteworthy costumes;
(1) Gold and black print dress, gold wool fitting coat, black straw hat, and green gloves.
(2) Bronze green dressmaker full-length coat, a print silk dress with green and yellow predominating, a black straw hat with a gold veil, beige gloves.
(3) Black full-length coat, a white silk ascot, two gold lapel clips, a wide patent belt, black hat, white gloves.
(4) Moss green full-length coat, print dress, apple blossom pink hat, pink gloves to match hat.
________
Noble Idea.
Because of the popularity of some colors, there will be some who will wear a less popular color in order to be individual. Thus brown is literally and figuratively a dark horse for spring.
(1) In the case of your new dark brown bag and shoes, wear beige coat or dress, a beige fishnet turban, and a bright green bag.
(2) Or beige two-piece suit, a red hat with a gold veil, and Chinese red gloves.
(3) Or a gold crepe dress, a natural straw hat with a bright blue ribbon trim, and bright blue gloves.
_______________
The Copper Touch.
Japonica, new clay, British tan, copper, rust, yum, or what have you is combined in new collections as follows:
(1) A matching greenish-blue coat and dress, a brilliant yellow jonquil shoulder bouquet, matching jonquil gloves, copper shoes and bag, copper felt hat with greenish-blue band.
(2) Dark-brown dress in dark a leaf green coat, suede pouch bag in copper, copper shoes, copper hat, coral necklace and gloves.
(4) Navy dress, natural beige coat, navy gloves, navy hat, heavy gold necklace, chopper shoes, copper bag.
 |
| Image Source |
Madcap.
And finally we come to dark-red shoes and bags, preferably in alligator, please, and sometimes referred to as mulberry, claret, wine Burgundy. If you must ... the budget rears its head .... you can have your alligator simulated. Or, if and alligator scared your mother, you can still have accessories in one of these deep rich reds in pigskin, suede, or a fabric.
Shoes and bag worn with the following, and you'll look good enough to eat:
(1) A hyacinth blue dress, a fishnet turban in blue and dark red, white or pale pink gloves.
(2) A chartreuse dress, dark red coat, soft blue hat, light beige gloves.
(3) A two-piece mauve pink dress, lilac gloves, fuchsia hat of veiling.
(4) A leaf green wool jacket, a vivid green wool skirt, brown hat, citron gloves."
 |
| Source |

 |
| Image Source |
Don't forget to leave me a comment if you want to enter the contest! The deadline for sending me a photo will be April 30th. I'll announce the winner on May 3rd. Ready, set, go!
Subscribe to:
Posts (Atom)
