Sunday, November 21, 2021

A New and Exciting Business Endeavor

As many of you may know, I purchased At the Sign of the Golden Scissors and Larkin & Smith sewing pattern line back in August. I've been working hard all year to achieve this goal and I'm so excited by the many possibilities this endeavor offers in allowing me to continue sharing my love of sewing, research and creativity with a wider audience and in a more official capacity than I have been able to do in the past. This will benefit living history peeps as well as historical costumers! I am working diligently to reprint each of the beloved Larkin & Smith 18th century sewing patterns, starting with the English Gown and the Front and Back Lacing Stays. As we head into the holiday shopping season I will be adding more items to the website, many of them will be new Old Stock items from the former owners.
What does all this mean for Emily's Vintage Visions? Well, starting next year I will begin incorporating my vintage style reproductions and curated collection of true vintage and antique items for sale on the Golden Scissors website. How exciting to be able to combine a love of historical and vintage sewing under one roof! My Instagram accounts and Facebook pages for Emily's Vintage Visions and At the Sign of the Golden Scissors will remain as they are - independent of each other - so you will be able to follow one or both as you choose.
What's Next? MARK YOUR CALENDARS!

Schedule for listing Black Friday and Small Business Saturday Specials!! New items will be listed each day starting at 8am EST so check back often.

11/23/21 - Pin Cushions and Pin Balls

11/24/21 - Books, Odds & Ends

11/25/21 - New Old Stock Cap patterns and kits

11/26/21 - New Old Stock Embroidery kits, crewel yarn bundles

11/27/21 - New Old Stock Fashionable Gown patterns

Please note availability of certain items is very limited. In most cases there will only be one or two of each item. We will do our best to combine shipping when possible.

Friday, August 6, 2021

Big Announcement Coming Soon!

Hello everyone! I know it's been ages since I last posted anything on my blog. However, I will have a big announcement coming soon that I hope will be as exciting to the living history and historical costuming communities as it is to me. I have big plans and I can't wait to share them with you so stay tuned! My Etsy shop is currently set to vacation mode. I will be moving future listing to a new platform.

Friday, July 31, 2020

How To Refill a Vintage Compact

Before you even think about refilling your vintage compact, you need to clean it. If there is any old makeup present, it can harbor dust, bacteria, and potential irritants. Yuck!! Use hot soapy water. Q-tips and small tooth brushes can be helpful to thoroughly clean the inside of your vintage compact. To sanitize your compact soak a cotton ball with rubbing alcohol and wipe the inside. Then rinse with warm water and set aside to dry.


Take care with certain vintage compacts as the mirrors can come loose and will need to be re-glued. Also some compacts have rhinestones or other special details or finished that should not be submerged in water. If that's the case you might want to consider refilling a different compact. However, if you are careful these can still be cleaned, refilled and enjoyed.


So, here is what you are going to need:

- Rubbing alcohol
- Loose powder or pressed powder in your choice of color
- Freshly cleaned vintage compact - Scrap of cheesecloth or linen fabric (optional)
- Small bowl to mix powder
- Butter knife or piece of stiff paper/card stock
- Small spoon

In a small, clean bowl, spoon in some loose powder or you can use a butter knife to scrape out your pressed powder from a modern compact.

Using a small spoon, slowly mix a little rubbing alcohol (about a cap full) with the powder until you form a creamy paste. Don't add too much liquid to start or you will end up with a soupy mess! It's better to add a tiny amount first and add more as needed. Be sure to smooth out any lumps as you mix.

Scoop the paste into vintage compact pan and gently press into place with the back of your spoon. Smooth out any irregularities with your knife or stiff paper/card stock. Be sure not to overfill your compact. Use a cotton ball or q-tip to clean up the edges of your compact.

This next step is optional but makes a nice finish to your powder. Take a scrap cheesecloth or linen fabric and gently press over the compact. Remove. The cloth will create a nice surface look and help smooth powder.

Keep the compact open and allow to dry overnight. Before attempting to use your newly filled vintage compact, make sure the surface is dry by wiping a finger across it. When the compact is ready to use it should feel 'powdery' and smooth.

That's it!

Monday, July 1, 2019

So You Want to be a WAVES Reenactor

So you want to be a WAVES reenactor. How do you start building an impression? Where do you get your uniform? What do you need to get started? What are some basic resources? This blog post, along with the rest of my summer WAVES series, will help you get started.

How to Build an Accurate WAVES Living History Impression.

Before we dive in, let me start by saying this as a bit of a disclaimer. I won't lie to you, or try and sugar coat things. Building a WAVES impression, or any women's WWII military impression for that matter, is NOT CHEAP. Before you buy anything, I urge you to do tons of research, ask lots of questions and shop around. (It took me nearly three years to track down all the pieces I needed for the standard blue uniform.) Unlike other women's WWII impressions, no one is reproducing WAVES uniforms. That means almost everything you need for your uniform will be the real deal. (I see this as both good and bad, but more on that later.) It means tracking down a uniform that not only is your size, but also in good enough condition to be worn. These items are 70+ years old after all!

A full uniform, i.e. the standard blue jacket (sometimes called a tunic) and matching skirt, hat, tie, and blouse can cost somewhere in the neighborhood of $200 to $350. Add shoes (vintage or repro) and the purse and you are talking another $200 easily. (I've seen the purses alone sell between $100 and $300 depending on the seller and condition of the purse.) For some reason the prices on Ebay for WAVES items have sky rocketed in recent years! Some of the most sought after pieces, such as the seersucker uniforms and the summer whites, have sold for ridiculous prices. This is where shopping around, networking with others in the know, and setting yourself a budget can be really helpful. Don't despair, because in time the right pieces will find you!!

- - I don't say any of this to scare people away from the impression, I just want to be as honest and upfront as I can. I hate seeing new people in the hobby spend their hard earned money on incorrect items or things that just can't be used. Don't fear! There ARE ways that you can portray a WAVE that won't break the piggy bank. - -

So, let's get started!!
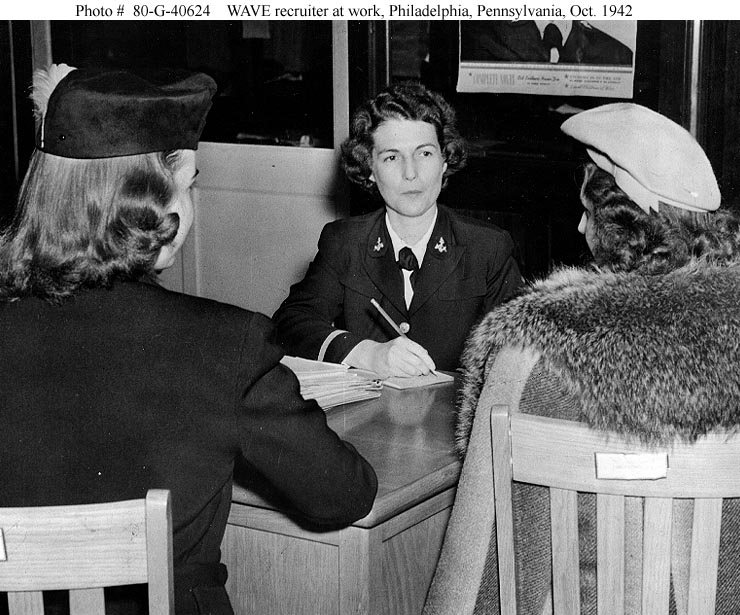
https://www.ibiblio.org/hyperwar/OnlineLibrary/photos/images/g40000/g40624.jpg
Source - Photo #: 80-G-40624 WAVES recruiting activities
Ensign May Herrmann talks to two young women concerning enlistment in the Navy Women's Reserve, at the Officer Procurement office, Philadelphia, Pennsylvania, 30 October 1942.
Official U.S. Navy Photograph, now in the collections of the National Archives.
Image result for wwii waves recruits
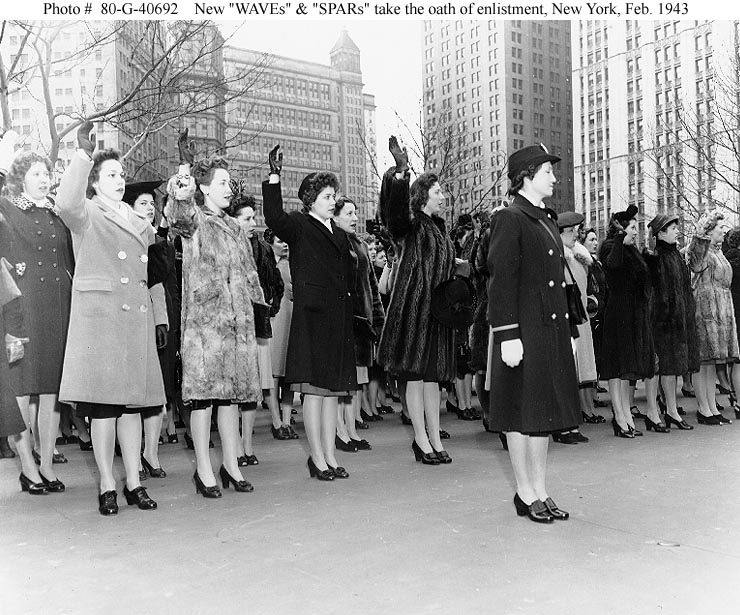
Source - Photo #: 80-G-40692 "WAVES and SPARS Day", New York City
New WAVES and SPARS take the oath of enlistment in a ceremony held in front of New York City Hall, 8 February 1943.
Official U.S. Navy Photograph, now in the collections of the National Archives.

Related image
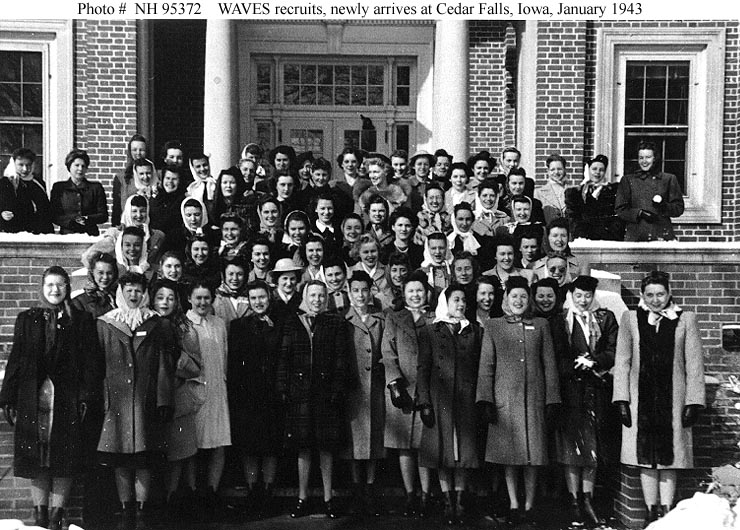
Source - Photo #: NH 95372 Navy WAVES training school, Iowa State Teachers College, Cedar Falls, Iowa

Newly-arrived WAVES recruits pose for a group portrait at the school, before the arrival of their uniforms, January 1943.
Shirley Feldstein (Bell) is 3rd from right in the front row, with a white name tag visible on her coat.
She comments, on the reverse of the original print: "We all look like penguins ready for a slide in the snow".
Donation of Shirley Feldstein Bell.
U.S. Naval Historical Center Photograph.

The easiest and least expensive way to start your WAVES impression is to wear 1940s civilian clothing along with an enlistment pin. The shop Peachy Keen sells them for a few dollars. (They also sell a bunch of other cool stuff so be sure to look through the whole shop!) If you have an interest in WWII reenacting, chances are you already have a basic 1940s outfit. If not, start with a pair 1940s style high waist pants or an A line skirt and a basic 1940s blouse. Add some basic accessories and you are on your way!

If you sew, I highly recommend Wearing History's Smooth Sailing Togs. Go with the e-pattern if you are really on a budget. A simple, but well put together civilian outfit, with a handful of period correct accessories, will take you a long way and will work for many WWII era living history impressions.

By adding a WAVES enlistment pin, you can portray a new WAVES recruit on your way to basic training while you continue your research and save up for those first uniform pieces!

Smooth Sailing Trousers (shown with Smooth Sailing Blouse AND Blouse from Sailor Girl Playsuit)
Sports Togs Paper Pattern: http://wearinghistory.clothing/smooth-sailing-1930s-sports-togs-pattern/
Epattern:
Sports Togs A: http://wearinghistory.clothing/e-pattern-size-pack-a-smooth-sailing-1930s-sports-togs-pattern/
Sports Togs B: http://wearinghistory.clothing/e-pattern-size-pack-b-smooth-sailing-1930s-sports-togs-pattern/
Pins available through Peachy Keen
Shoes and blouses are the easiest places to save a few pennies. Look around on Ebay and Etsy for good deals on vintage shoes but also check your local antique shops, thrift shops and flea markets. Places like Amazon offer basic black oxfords at lower prices but watch the height and shape of heels as many are not period correct. However, if you can grab a basic, so-so correct pair for say, $25 or $30 do it. You can always upgrade later. WAVES shoes, worn with everything except the white uniform, should be a plain black lace up oxford style with low heeled (1" to 1 /12") and closed toe. Though some women wore privately purchased shoes that had a small amount of perforations (decoration), try is go as plain as possible. The standard issued shoes were plain, and yes, kind of ugly.

The best option on the market right now for reproduction oxfords are the O.A.O. Oxfords from All Heels on Duty. The are a direct copy of WWII women's military footwear, are solidly made, and super comfortable. These will serve you well for everyday vintage wear as well as both your 1940s civilian and military impressions. (I hear their next style will be the military heeled pumps!!)

Image may contain: one or more people, people sitting and shoes
Imaging showing a WAVE polishing her standard issued oxfords.

Style A is want you want to look for, though a slightly lower heel would be good. Image from Glamourdaze
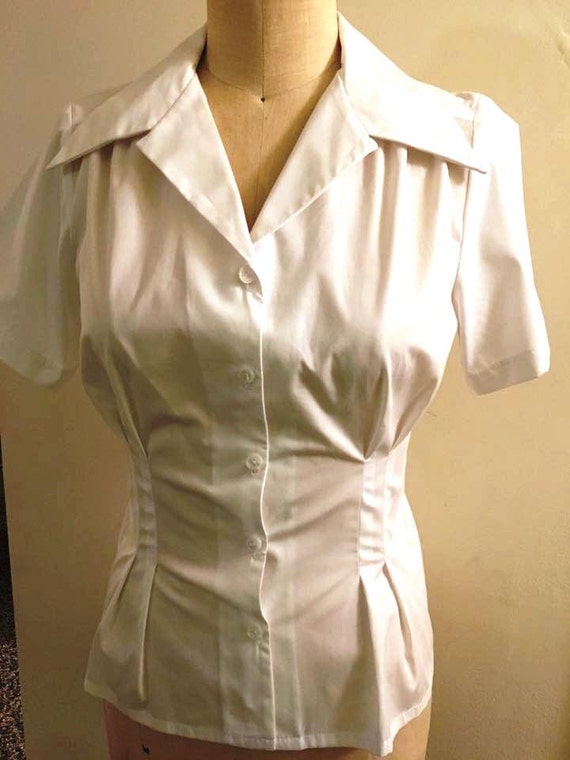
White cotton blouses (worn with both the blue and white WAVES uniforms) can be long or be short sleeved, with a yoke if possible, and free of any kind of trim or embellishments. The most important thing for the blouses is the collar shape. It should be pointed and the blouse must button at the neck to allow it to be worn with the tie.

Early war ties for the WAVES are two pieces and button at the sides of the neck under the collar. You can add these buttons to a new blouse in a flash. Another thing to keep in mind if you are on a tight budget is that your reproduction white blouse and shoes can double for civilian wear! Score!

Blouse from Nudeedudee on Etsy

Notes on Sewing Your Own Uniforms

There are no patterns on the market for WAVES uniforms, though a highly skilled seamstress can draft patterns from originals.

As these are military uniforms, the materials used and construction details are very specific! Finding the correct materials for the blue wool uniforms and the cotton seersucker uniforms will be challenging but not completely impossible. I highly recommend examining originals (or high res photos) to gather information about the cut/fit and fabrics used. Invest in an original hat (overseas/garrison or soft crown with the WAVES tally), patches for the collar and buttons to complete the look if you are sewing your own inform. These will help immensely with giving an authentic look and feel. You can also take these items with you to fabric stores to help guide your search for fabric. Both the overseas/garrison caps in wool and seersucker, as well as the seersucker rating patches are the same materials as the rest of the uniforms. The blue rating patches for the most part are the same too.

Ordering fabrics online for any sewing project can be frustrating, so I highly recommend ordering fabric swatches first to match the correct color and weave.

----------

I hope this mini introduction into WAVES uniforms is helpful! Our next WAVES post will cover research materials. Future posts will also go into more detail about uniforms, how they are worn and what to look for when shopping for originals!

Have a research question about the WAVES? Ask away! 


Sunday, June 16, 2019

Sold But Not Forgotten - Du Barry 2413B

I haven't blogged in some time, so today I'm writing up a quick post on a past sewing project to help get back into the swing of things.

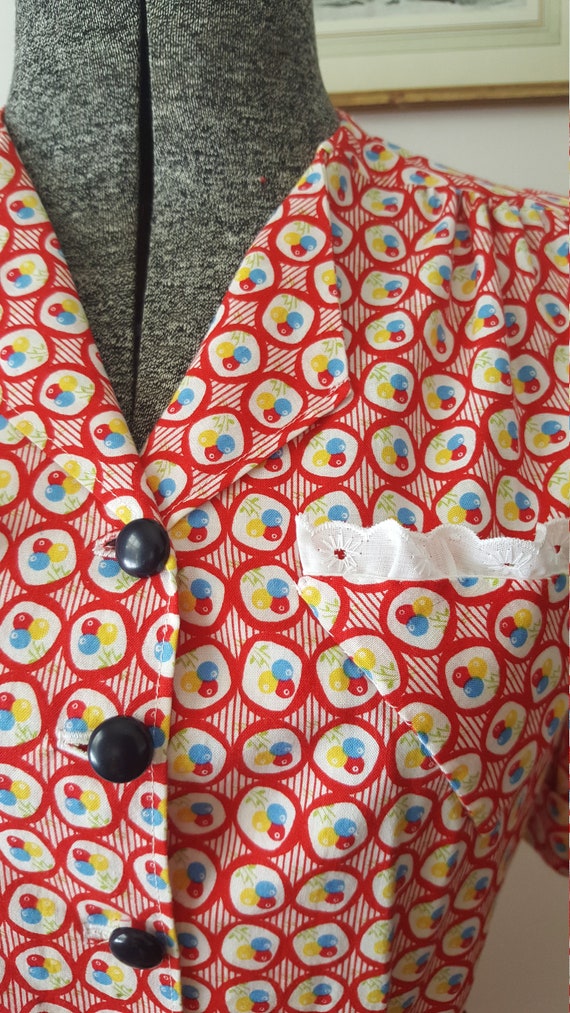
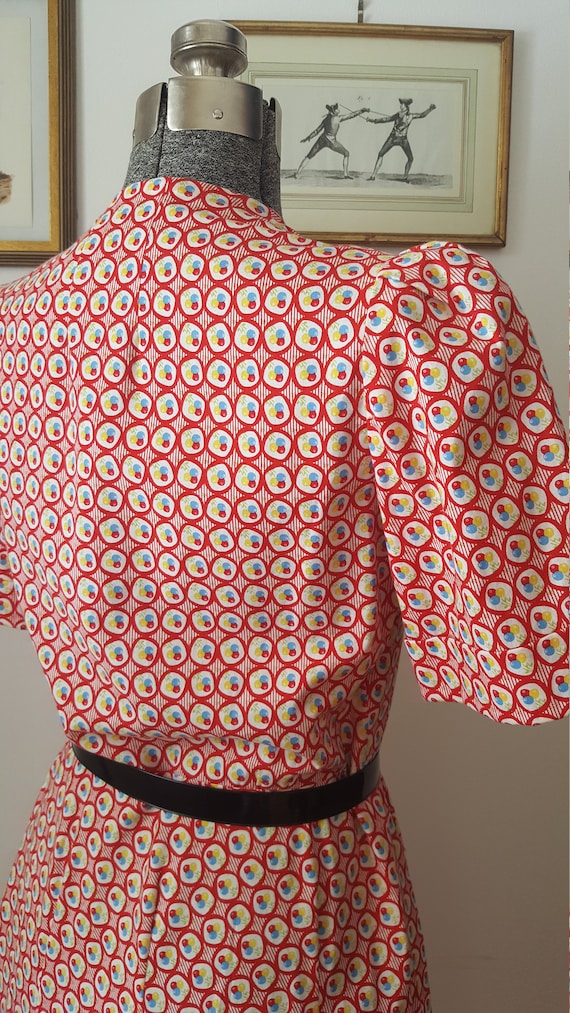
This dress is easily one of my top ten favorites of all the reproduction pieces I've made to sell so far. This super cute 1930s/40s reproduction cotton print was a lucky find at my local fabric shop. (I was also able to find it in a purple colorway as well!) A few of you may remember the first time I used Du Barry 2413B, waaaaay back when I first started sewing 30s/40s clothing for myself. It's a great pattern and one I can see myself sewing a few more times!

It's a fairly basic pattern but it has some great details too. I love the option of the little V-shaped pockets! They make the perfect accent for a war-era dress. While the skirt does have some tiny pin tucks, they are kind of lost in this particular print. I think in a solid fabric they would stand out a bit more.

Here are a few in progress shots on the dress. Another thing I like about this dress are the little pouf sleeves and gathering at the shoulders.


Playing with some trim for the pockets! I ended up using this cotton eyelet. It helped break up the bright red print just bit. I added some dark colored vintage buttons from the stash too for the same reason.


Here are a few photos of the finished dress. I'm very happy with how this one turned out.


My friend Christiana bought the dress and she looks amazing in it! She even wore it for a photo session with A Timeless Collection. Here are a few images from that shoot, shown with permission.

Photo by A Timeless Collection

Photo by A Timeless Collection

Interested in purchasing a reproduction dress or blouse from me? Have a look at my Etsy shop.

Summary of the Pattern
Fabric: Late 1930s/early 1940s reproduction cotton print
Pattern: Du Barry 2413B
Year: About 1938/39
Notions: Buttons, thread, cotton lace trim
Time to Complete: Start to finish, I'd say about a week. It's an easy pattern to complete in a weekend if you have the time to sit and sew.
How historically accurate is it? Pretty darn close! The pattern is original vintage and the fabric is a historically accurate print. The buttons and lace trim, though vintage, are likely 1950s or 1960s.
Any tricky parts to the pattern? I've made this pattern once before and it goes together pretty easily.
Did you change anything? I chose not to add a side zipper. Instead of adding a collar I just turned but the front edges to form mini lapels.

Friday, April 26, 2019

Blog Update!

Hi folks!! It's been a looooong time since my last blog post! Just wanted to post a quick update to let you know I have not forgotten or abandoned this site. I have lots of things I want to blog about but finding the time over the last year has been a challenge.

I'm still sewing, still trying to sell my reproduction clothing, and working on a couple different research projects to get ready for some exciting events this summer. I also plan to do a little house cleaning on this site and change things up just a bit.

For regular updates on my sewing and research projects be sure to follow me on Facebook and Instagram. That's all for now!!


Sunday, May 20, 2018

1770s Fashionable Gown - In Progress, Part 1

As I mentioned briefly in my last post, I have jumped head first back into historical sewing. The fabric, pattern and bodice mock up had been sitting in the stash for over a year now. So when my friend planned a sewing weekend with some of our reenacting friends early this spring, I figured it was a good excuse to pull out the project and get back to work.

I'm using the 1770s Fashionable Gown pattern from Sign of the Golden Scissors. This pattern is fantastic and has needed only very slight alterations to make it fit. While some may raise an eyebrow at the price of this pattern, keep in mind you are getting A LOT for your money. All Smith and Larkin historical sewing patterns are essentially one of their two day sewing workshops in an envelope. It's not just the paper pattern for the gown and bum roll, but historically accurate sewing instructions, notes on fitting, fabric choices, stitches, etc. as well as historical information on the particular garment you are going to recreate. Included is a colorful documentation card that you can carry with you if you choose. The instruction booklet for the 1770s gown is 35 pages with color photographs to help you with each step When making an item of historical clothing, it's important to make a mock up. Especially if you have never used the pattern before. I've made a few 18th century gowns before so I'm pretty familiar with the steps involved. However, the fit of this particular gown is very different from my other gowns. First off, it's important to note that this style of gown is high fashion for the mid 1770s. The neckline and placement of the shoulder straps reflect that, as well as the looping of the gown skirts. This gown would not be appropriate for my normal middling class or British camp follower impressions. I'm not making this for any particular event, but rather more of a "just because I can" kind of project. And yes, it's going to be entirely hand sewn for the same reason.

Fabric choice is super important, I went with a lovely striped silk taffeta that is similar to what I've seen in period portraits and original gowns.


I used some miscellaneous fabric in my stash for the mock up. There are two sizes in each envelope so I cut the 34 bust as it seemed closest to my size when wearing my stays. The only adjustments I found were needed were to shorten the shoulder straps a bit and to lower the arm holes just a touch. After that I moved on to cutting out my lining and silk bodice.

During my friend's sewing weekend I completed my bum roll, assembled the linen lining, minus sleeves and shoulder straps, and cut out all the pieces for the silk bodice. I even finished sewing the pleats into the gown back pieces.


The side seams of both the linen lining and the silk are constructed with lapped seams. The sleeves use the same period technique but require an extra step to whip the lining into place. For those that have the new American Duchess kind to 18th century sewing the lapped seam in shown on pages, __.

Here is what the sleeves look like prior to stitching. I posted a live video on my Facebook page talking about this if you would like more details.


I spent one evening cutting out the panels for my gown skirts. Originally, I thought would skip the step of cutting my silk into period correct widths and save a little sewing time. The gown skirts are made up of two front panels, two sides, and one center back panel.

As it turned out, given the actual width of my silk and not wanting to waste any, it was actually easier to follow the instructions and cut multiple widths and then tapper the lower edge of each panel as needed. (Because bum roll!!) The instructions called for each panel to be 23 inches wide, as that matched the width of the original gown the pattern was based on. My silk was 50 inches wide so my panels are actually 25 inches wide. I will be able to incorporate the selvedge edge of the fabric into the gown fronts which will be nice. And of course I had kitty "help" because no sewing project would be complete without it!

With help from my husband, I tired the linen lining on to test the fit again. Then had him help me pin the silk on top, again to test the fit. Something just seemed wonky with the fit but was excited to see the gown taking shape. I suspected the fit issues had to do with the waist placement so I consulted the fitting section of the American Duchess 18th Century Dressmaking Guide. Turns out I was correct so I will need to bring the lower edge of the waist up just a bit before adding the skirts to get rid of the bodice wrinkles. Once I attach the skirts the weight of the silk will help smooth things out as well.

So, my next steps with this gown will be to pleat the skirts (SOOOOOOOO MUCH PLEATS!) Make my adjustments to the bodice and reattach the linen shoulder straps so the skirts can be attached. Then assemble the bodice lining and fashion fabric. Once that's done I can set the sleeves (again with help from the husband) and add the silk shoulder straps. The only thing left from there will be hemming and trimming! 

FITTING NOTES!!
  • This pattern was created as a one for one copy of an original in a private collection. The bodice fronts were pieced on the original gown so a pattern piece is included for the "bodice front extension." Instructions for the gown trim are also based off the original.
  • This gown is designed to wear over period correct undergarments i.e. shift, 1770s/80s stays, bum roll and, if you wear one, an under petticoat. Pick you pattern size based on your measurements while wearing proper undergarments.
  • This style also requires a bum roll to help give the gown it's "fashionable" shape. The pattern and instructions for the bum roll are included.
  • The shoulders may feel very restricting at first. I found when I first tried the mock up on that I had to rotate the whole bodice further back then I thought. Then the neckline, which is lower and wider than my 1750s/60s gowns, sat where it needed to which should be just above the top of the stays. 
  • The arm holes are meant to be high and snug and the sleeves should fit closely as well. You will want to make sure your shift is a mid to late 18th century style with close fitting sleeves to eliminate bulk.
  • The lower back section of the bodice is not meant to sit flat against the back, it needs to have some "space" if you will, to fit over the bum roll.

WAVES

WAC and WAVE uniforms in ad by Fashion Frocks, 1940s.  by annamouse, via Flickr


photos

WAVES:  Women Accepted for Volunteer Emergency Service

Women 20 to 36, Earn a Navy Rating.  US.  Navy.  Waves.  c. 1943.
Source

Tuesday, March 20, 2018

Playing Catch Up - What's been happening

I'm finally sitting down to write real blog post. I have so much to share! I had not really realized how busy things have been until this week when I actually found myself with some much needed down time.

Most of January was spent finishing up some long neglected projects in the UFO pile, and I'm pleased to report I've made it through about half of the pile. The items that are left will need to be reevaluated so I can reside what's really worth finishing and what can be reused for other projects or just tossed. I'm at the point where I really want to clean and organize the sewing room and the UFO pile is a great place to start.

Here's a look at what I've finished!

Reproduction 1940s pinafores - Available here on Etsy

At the end of February I attended the Northeast Reenactors Fair and set up a booth for Emily's Vintage Visions along side Joani from A Timeless Collection. I had heard good things about the fair in the past but never had the change to go. This was a new experience for me as I've only done a handful of displays and vendor shows. Overall it was a successful weekend but I think I'll plan my set up a little differently next time. The Reenactors Fair was a great opportunity to meet and visit with people. One of the highlights was actually getting to do a live FB video at the end of Saturday with Joani, even if the video was sideways! Ooops!


Photo credit - A Timeless Collection

The first weekend of March was the GBVS's White Lightning Ball. Another fun event and one I look forward to each year. I was super excited (but also really nervous!) to debut the 1920s style head pieces I have been working on. They are made from vintage, and in some cases antique, trims and feathers in my stash. The two silver head pieces with the feather sold right away! I couldn't believe it!


Thanks to A Timeless Collection for this photo of hubby and I at the @Greater Boston Vintage Society's White Lightning Ball this past Saturday. He is wearing a 40s vintage sweater and pants fromOverAttired Vintage Fashion. My late 1920s/early 1930s dress is from @We, McGee Vintage

Over the last couple of weeks I picked up a sewing project I first started well over a year ago, a new 1770s gown!!! I can't begin to tell you how good it feels to dive head first back into historical sewing!! It's really my zen sewing, and yes, I'm doing all by hand. I'm using the Fashionable Gown pattern from Sign of the Golden Scissors. I've posted a few pictures on my Instagram account as well as on Facebook. There will be a proper blog post, or two, on the gown. So far I'v been good about taking construction pictures.


Thursday, February 1, 2018

WAVES - Women Accepted for Volunteer Emergency Service (Blog Series)

Hello all, 
Wow, is it really February already? I'm OK with that because it means spring is just around the corner, and I'm ready for some warmer weather. One of the things I mentioned in my last post, one of the things all be working on in 2018 is sharing more information about the WAVES during WWII.
This is the first of several planned posts. To start, I thought I would give a brief overview of the WAVES and some basic facts. Later on I will have some more in-depth posts that discuss uniforms, various jobs, personal experiences of WAVES as well as what it is like to be a WAVES reenactor. I will be teaming up with my friend Sara from the Canteen Cowboy on some of these. I hope you will follow along!  

Recruiting poster for the U.S. Navy WAVES (Women Accepted for Volunteer Emergency Service) during world War II. Illustration by John Falter, 1943.
Pinterest
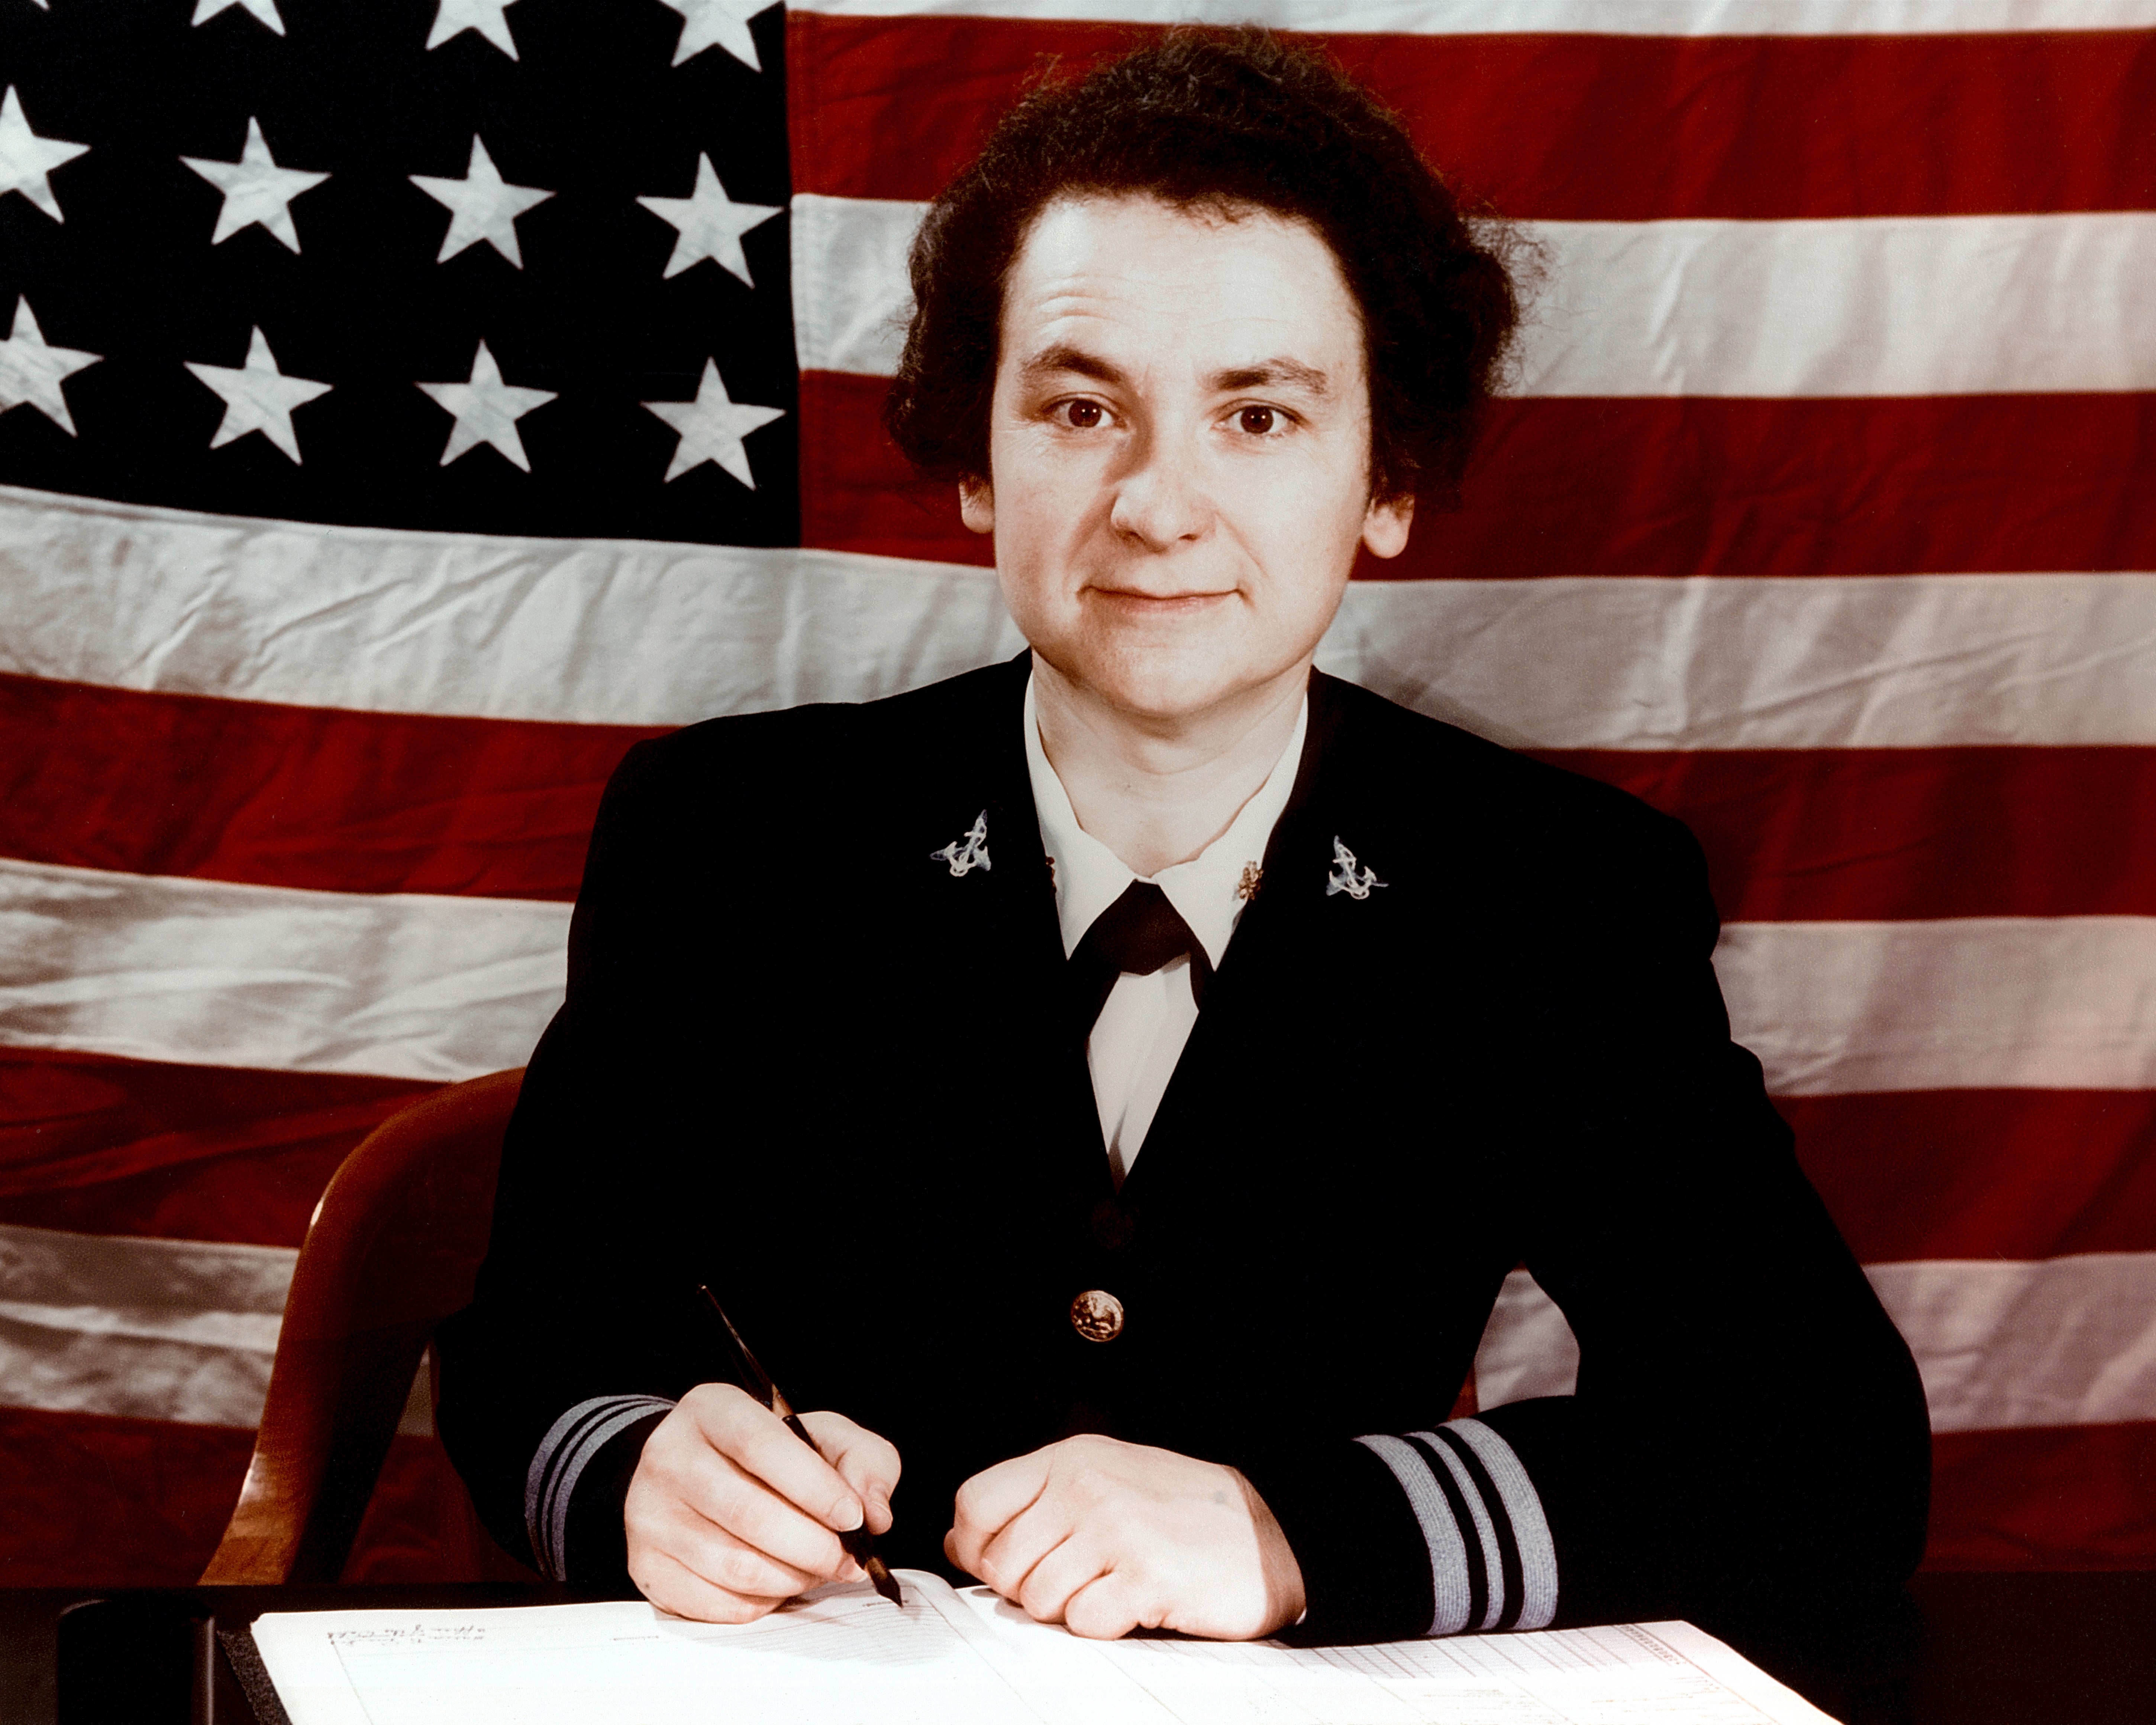
LCDR McAfee while director of the WAVES - Source
The WAVES (Women Accepted for Volunteer Emergency Service) program was created in July 30, 1942 as the need for additional military personnel grew during World War II. The WAVES were an all-woman division of the U.S. Navy with its members holding the same rank and ratings as male personnel. WAVES also received equal pay and were subject to the same military discipline as male personnel. 

The Women's Reserve of the Coast Guard (SPARS) was created on Nov. 23, 1942 "to expedite the war effort by providing for releasing officers and men for duty at sea and their replacement by women in the shore establishment of the Coast Guard". The first 153 enlisted SPARs and 15 SPAR officers were former WAVES who agreed to be discharged from the Navy and join the Coast Guard.

WAVES and SPARS duties were restricted to the continental U.S. until late in 1944, when overseas service was finally authorized for the WAVES. Even then the WAVES were restricted to the U.S. territories of Alaska and Hawaii. While many WAVES filled traditionally female secretarial and clerical jobs, thousands more served pushed the gender barrier and took on duties in the aviation community, Judge Advocate General Corps, medical professions, communications, intelligence, science and technology.  Aviation Machinist's Mates, Aviation Metalsmiths, Control Tower Operators, Aerographer's Mates, Link Trainer Instructors, and Parachute Riggers are just a few of the duties performed by WAVES during the war.

At the end of World War II, there were over 8,000 female officers and as many as 80,000 enlisted WAVES, equaling roughly 2-1/2 percent of the Navy's total strength.

Fast Facts
  •  In August 1942, Mildred McAfee, was sworn in as a Naval Reserve Lt. Commander, becoming the first woman commissioned as an officer of the U.S. Navy. 
  • Within the first year, over 27,000 women joined the WAVES. 
  • The notable New York fashion house, Mainbocher, designed the WAVES uniforms. The design services were secured through the efforts of Mrs. James V. Forrestal, wife of the Assistant Secretary of the Navy. 
  • By mid-1944, the WAVES began accepting African-American women. Harriet Ida Pickens and Frances Wills became the Navy's first, and only, African-American WAVES officers in December 1944. Approximately one in every 36 women who enlisted and trained for the WAVES was an African-American. 
  • As many as a third of all WAVES were assigned to naval aviation. These women fixed aircraft, packed parachutes, provided weather information, served as link trainer instructors, gunnery instructors, coordinated air traffic from control towers and a performed host of other aviation-related jobs. 
  • By 1945, enlisted women could choose from a total of 38 different ratings in the Navy. Almost every shore establishment had WAVES on active duty fulfilling necessary military work of every kind, from general office workers and supply accounts specialists to film projectionists and drivers to dental prosthetic technicians. At the Navy Department headquarters in Washington, D.C., over half of all service personnel were WAVES. Approximately 70 percent of the Bureau of Naval Personnel was composed of WAVES. Large numbers of WAVES were assigned to the Hospital Corps where they participated in Navy recovery, therapy and rehabilitation programs. 
  • By the end of World War II, the WAVES consisted of 8,000 female officers and close to 80,000 enlisted women.
  •  By September of 1946, the majority of WAVES were either discharged or released to inactive duty. 
  • Despite their involvement in World War II and post-war, the organization was disbanded in 1948 when the Women’s Armed Services Integration Act was passed.  This new law permitted women permanent status within the armed forces.  Despite this change, the acronym WAVES continued to be used for almost 30 more years.    

Thursday, January 25, 2018

2017 Sewing Year in Review

Each year I seem to start out with a grand list of projects, more than I know I'll actually complete. Though I guess there's nothing wrong with feeling ambitious. It's fun to plan new projects but feels even better to get them completed. However, 2017 was not my year for getting things done. I need to learn to be more realistic in my goals and except that it's perfectly OK to take time for myself.

The winter months can be hard for many of us, and I admit I was struggling at this same time last year to find the motivation to work on things. I was just starting to find my sewing groove when in March, I learned that my best friend from childhood last his battle with cancer. Then in August my brother passed away unexpectedly. It's still a struggle but I'm finding ways to move forward. Anyone who has experienced the loss of a loved one will undoubtedly know how important that is to do. For me it means making more time for visits with family and friends, spending time working with the horses and yes, evening working on some sewing. (Thank you again to everyone who reached out with your thoughts, prayers and words of encouragement!)

So, given the crap year I had in 2017, I'm rather surprised by what I was able to accomplish. And to be fair, not all of 2017 was bad. There were many good things that happened.

Completed Sewing Projects for 2017
1940s blue linen pants and matching bolero for my friend Beth
Red linen 1930s pants
1940s white cotton blouse
1930s denim pj pants for day wear
1940s Gold corduroy jerkin
Early 1940s wool plaid skirt
1920s ivory velvet dress


Projects Started in 2017 But Not Completed (Yet!)
1940s green linen pants and matching bolero
1940s wool plaid dress
1940s pinafore with rickrack trim
Mock up for 1770s "fashionable gown" 
1920s green silk dress


So, what else did I do in 2017 you ask? I went to a bunch of events....

Events
GBVS's White Lightning Ball
Reading Air Show
Forth of July American Timeline at Strawberry Banke Museum
WAVES Display at the Living History Association Timeline
GBVS's 1920s Lawn Party at the Crane Estate
260th Anniversary of Siege of Ft William Henry
Collings Foundation Battle annual Battle for the Airfield  
GBVS's Winter Formal


Other Projects and Cool Stuff from 2017
I actually posted a few videos for my YouTube channel! Go me!! And at the end of 2017 I had almost 1000 followers on Instagram which is pretty cool. I'm just over that number now. :)

At the Reading Air Show I got to meet Emileigh Rogers of the blog Flashback Summer in person. She camped with my group for the whole weekend and we had a blast!

I set up my very first WAVES display this summer at a small timeline event. Visitors seemed to really enjoy it so now I'm supper motivated to continue my research and document my growing collection of WAVES-related items.

With all the stress and heartache that 2017 brought, one of the things that has really helped is working with my sister and her horses. Pony therapy is the best!!! Animals really do understand. A few days after my brother passed, my sister, sister in law and I all went riding. It was exactly what we needed. Just to prove to ourselves that it was possible, even in the worst of times, to get back in the saddle. Physically as well as metaphorically speaking.

I made some really good progress this summer and I'm hoping to continue riding when the weather gets better. I rode a couple days each week and when the time a weather allowed sometimes I rode all three horses.


Looking Ahead to 2018
Other than the normal, eat better, be more organized and work from the fabric stash kind of plans for 2018, I hope to do a few more videos for my YouTube channel as well as some more live videos on Facebook and/or Instagram. I think this is a really fun feature and I know several bloggers and small businesses have had great success with it. If you have an idea for a video, let me know! I have plans for revamping my Etsy shop so right now listings are kind of slim. As I finish the reproduction items that have been languishing in the UFO pile, and get good photos of them, I will be listing a bunch of new stuff! If you are in the New England area look for me at the Northeast Reenactors Fair next month!!

Other exciting things in the works for 2018 include working with my friend Sara on a series of blog posts about the WAVES during WWII. We are both collectors of all things WAVES and we want to be able to share our research with others. I'm hoping to have the first post up sometime early next month.

I look forward to working more with A Timeless Collection this year too. If you are not already following them on Facebook or Instagram, you need to! We have a special group photo shoot planned for this weekend and I can't wait to share more about it.

So yeah, I guess that pretty much wraps up my last year. What are you plans and goals this year?

Sunday, December 17, 2017

December Vintage Style

Just a quick post today! I'm joining Flashback Summer's Vintage December Style challenge. Lots of us have been sharing our outfits on Instagram this month. If you want to join in or just follow along, be sure to check out the tag #decembervintagestyle.

#vintagedecemberstyle with Flashback Summer
I haven't done much sewing this year, so all but one of these outfits are from last year. Still, I'm hoping to go through the closet and see what I can come up with for some new festive attire.

First up is the 1920s silk velvet dress that I wore earlier this month for the GBVS Winter Formal. Ivory and gold makes a nice combination for the Christmas season. You can read more about this outfit in my last blog post.


This 1940s evening dress is one I made back in 2013 for the very first GBVS Winter Formal. It's made from a most obnoxious shade of mustard crepe using Simplicity 1469. The dress is trimmed with modern sequins and jet beaded trim from the Victorian era.

Read more about making this dress


Here is what I wore last year when I was trimming our Christmas tree. I love the versatility of pinafores! This particular pinafore also works great for a Memorial Day or Fourth of July outfit!


And last but not least, a little 1950s for you! I don't often wear 50s but once in awhile I come across a piece that I really love. This coat is one of those pieces. The princess cut is flattering and super fun to wear over fuller skirts and dresses. More photos of this outfit in this post.


Related Posts Plugin for WordPress, Blogger...