Showing posts with label 1860s. Show all posts

Monday, June 1, 2015

"Behind the Seams" - 1860s Swiss Waist in Electric Blue

Greetings all! Today I begin the first of a new series of posts I'm calling "Behind the Seams." I hope to feature a different item each month! In these posts I want to show a few of the more interesting details of some of my vintage and antique garments. Creating each post is proving a little more time consuming that I originally planned but I think all the extra work will pay off in the end. I've always been interested in knowing what the insides of older clothing looks like, how it's sewn, etc. and really want to be able to show those details as best I can. Each post will include LOTS of photos. I'm not really sure how many is too many so your feed back will be most welcome. (Can there really ever be too many photos of an awesome vintage/antique dress?)

I would also like to hear from you, dear reader, what it is you would like to see. What kind of construction details are you most interested in? Any particular time period? Most of my collection is 1920s or newer but I do have several older pieces, such as the one featured today, that I think everyone will enjoy seeing.

This incredible little piece was a surprise find at an antique shop a few years back. I was on a mission looking for hats and was poking around a rather cluttered antique shop (the best kind) when I spied something bright blue a corner. And I mean bright, like electric, blue! Expecting a hat or scarf of some kind I pulled out this little beauty. Most certainly not a hat, lol!


This corselet, or Swiss waist, is a little worse for wear but what a great study piece! A Swiss waist is a boned, pointed underbust garment that was worn over skirts and blouses or dresses. They were very popular fashion accessory in the 1860s. Some even had shoulder straps, like this example. Often called corsages in the 1860s, the terms Swiss bodices, Swiss belts, or Swiss waist belts or simply waists are used to describe the same type of garment. They show up again in the 1880s and 1890s, which is when the name Swiss waist became common. Unlike a corset, a Swiss waist does not fastens with a metal front busk. They have a flat front, with or without a front opening, or can lace up the front with hand worked eyelets. The back fastens with lacing.

Black was a common color as seen in the print below. But many surviving examples, like mine, indicated that some women were not afraid of color! Or patterns! Check out this crazy plaid and paisely silk waist at the The Fenimore Art Museum. Also this one in teal.

(Godey’s, August 1862)
The inside of my waist is lined in dark blue cotton and each seam is stiffened with 1/4" wide baleen. I know it's baleen and not metal because you can see it in spots where the lining is torn or worn away.


The waist closes with 5 hooks and eyes and has 11 eyelets for a cord which is now missing. Each tiny eyelet is only about 1/8" in size and beautifully sewn. The hooks and eyes are most likely a more recent addition.


The edges of the waist are bound with self fabric piped with a narrow cotton cord. Piping was a very common detail on 19th clothing. The waist is also trimmed around the edges with self fabric ruching that is 5/8" wide.


 The eyelets are tiny but bound very neatly. This was made for a tiny gal! When laid flat it measures 24 1/2" long about 9" high at the center from. The back is slightly shorter at 7 3/4". The narrowest part is 2 5/8". It is made of 7 sections. I found it interesting that white thread and a darker brown thread was used to construct the waist. The modern seamstress it taught to use matching thread for her projects so the stitches are not as easily seen. However, on close examination, even on the front where the trim is attached, you can see the stitches. To me this is a good glue that this was something made at home rather then a professional, but I'll admit I have no documentation to support that.


I plan to make a pattern from this someday but I think you could easily draft one yourself from the measurements I've given. If you can't wait, don't worry! Katherine of Koshka the Cat has a pattern drafted from a waist in her own collection. The size and shape is a little different then mine but I really like it.

Source - The Graceful Lady
Source

Wednesday, April 17, 2013

Answer to My Photo Quiz

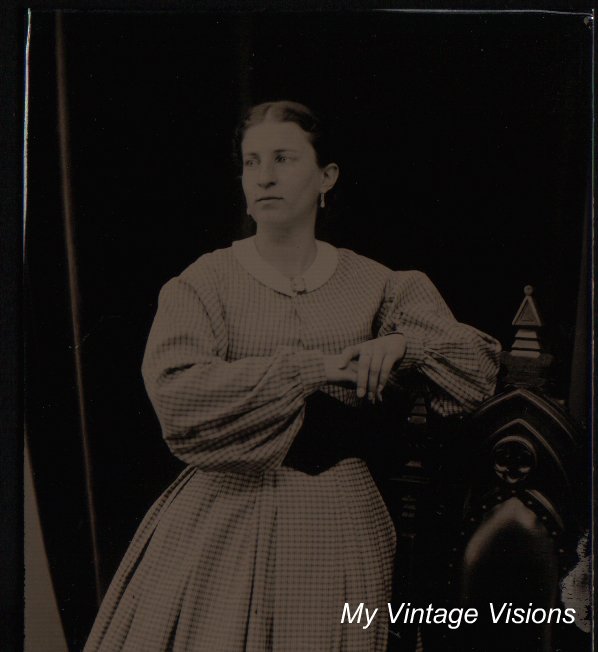
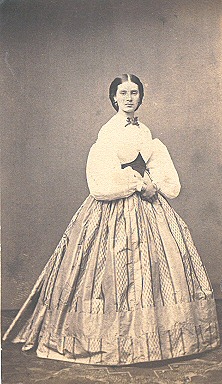
So I was hoping to have a few more guesses about the photos in my last post. But that's ok. Those of you who guessed photo 3 are correct. If you guessed photo 4 you are also correct! Yes, it was sort of a trick question. :) Both photos were taken during my 2010 trip to Gettysburg, PA at Rob Gibson's Wet Plate Photography Studio. You can view the online press kit for the studio here.

The first is a tin type and CDV copy of me. The pose is a little awkward I admit. The dress is one I made years ago. It's made from a small red, green. and white plaid cotton. I found it in the homespun section of my local fabric store. The black waist, added to give a little more contrast to the photo, was an accessory that belonged to the studio. It's hard to see but I'm also wear an original 19th century cameo that Cori bought for me when he was in Italy.

The skirt was box pleated and sewn to a narrow waistband. It the other picture you can see the black velvet belt I made to go with the dress. The bodice was drafted from an original I own.


Here is the tin type and CDV copy of Cori and I. The coat I'm wearing and all of Cori's clothing belongs to the studio. The coat Cori is wearing was made special for Rob for his role as John Wilkes Booth in the TV documentary April 1865. The cane, which is almost identical to own owned by Booth, is an original 19th century cane and was also used in the film. Cori looks great but I'm not crazy about how I look. Mostly I think because of the jacket.

The process Rob uses to create his tin types is the same process used in the 19th century. He even using an original camera. In making the CDV copies of the tin types the image is flipped. I had the opportunity to visit Rob's studio again this past March. I will be sharing photos of that visit shortly.


Tuesday, April 9, 2013

Quiz Time - Proof I Lived 150 Years Ago

Before I share my construction progress and finished photos of my 1860s plaid dress, (you can read a little about here and here) I would like to share some other photos. Do you ever think you were born in the wrong time period? Have you ever wondered what you would have looked like had you lived during another period of time?

Since the invention of photography, there have been many advances in the technology. Producing one single image used to be very time consuming and required the use of some rather nasty chemicals. Today it only takes a matter of seconds to point, click, and upload your images for the world to see. Photography is a wonderful art form that allows us to see into the world in which people were living 25, 50, or 100 years or more. It also allows us to recreate it. :)

And now for a little quiz ... Can you guess which is the real me?

These photographs were taken around 150 years ago. Or were they? ;) All of them were produced using the technology available in the 1850s and 1860s. Can anyone guess which of these photographs is actually of me and which are my 100+ year-old look-alikes? (Yes one of them really is me.)

Hint: Those of you who are familiar with a certain Civil War era photography book will probably be able to figure this out. ;)

Photo 1                                                                            Photo 2


Photo 3                               Photo 4


Photo 5                                                                               Photo 6


Leave a comment and let me know what you think!

Monday, April 8, 2013

Trip to Gettysburg, Pa

Hello all! I hope everyone had a good weekend. I finally got around to downloading some of my pictures from my trip to Gettysburg last month. This was my third trip to that fantastic little town but I think it's a site I will never get tired of visiting. There is always a new place to visit and something new to discover. I may have mentioned before but I do a lot of volunteer work at my local historical society. I'm also one of the intern coordinators for our student intern program. The interns help with research, cataloging, and when funds allow, we go on field trips to other museums and historic sites. Three of our seven student interns will be graduating from high school this spring so we wanted to our last big trip to be something special. Washington D.C. was just a bit too far and too expensive so we chose Gettysburg instead! Only four students were able to make the trip but we had a great time. 

This is the monument near the railroad cut (just to the right in the picture) where fighting on the first day of battle took place. I forget now which regiment that monument is dedicated to.


The interns and myself sitting inside the stump of one of the witness trees near Reynold's Woods where John Reynolds was killed on July 1, 1863. This is one of my favorite pictures from the trip.


Monument to the Vermont Sharpshooters.


Below is one of my favorite monuments, and not just because its for Vermont. It depicts Brig. Gen. William Wells and marks the area of the South Cavalry Field where the 1st Vermont attacked the Confederate right on July 3, 1863.


The bronze relief on the 1st Vt. Cav. monument has been stolen couple times. There is so much detail and movement in this relief.

It was so cold and windy on Little Round Top that we only stayed a short time. I didn't take many pictures there. We didn't make it to Devil's Den either but that's ok as I've been there before.

This next picture may not seem very exciting but it's a location that has special meaning to me. This is the area where the 16th Vermont engaged Perry's Brigade during Pickett's Charge on July 3, 1863. My great, great, great uncle fought with Co. H. of the 16th Vermont. He was one of the lucky. He survived the war and returned home. We have pictures of him later in life taking part in soldier's reunions and memorial day services in our home town. He was an active member of the Grand Army of the Republic (GAR) the veterans organization for Union veterans. We also have his GAR cane. He received an honorable discharge and to my knowledge was never wounded in battle.


Do any of you believe in ghosts? Ok, most likely those orbs are from the sun but hey, you never know. :)


Day two of our trip was to Antietam Battlefield. It should have only been a 45 minute drive from Gettysburg but after we missed our exit it turned out to be closer to an hour and 45 minutes! Ooops! We ended up traveling a winding, and very scenic, back road. Turns out this was the route the Confederates took on their forced march from Harpers Ferry to Sharpsburg. Along the way we saw the remains of the Chesapeake and Ohio Canal and the Antietam iron furnace.

We needed to get out and stretch our legs so we walked the loop around the cornfield were some of the bloodiest fighting of the Civil War took place. The area to the left in the picture is part of the East Woods. All those little white things you see are new trees protected by plastic tubes. I was very impressed at by the amount of work and dedication being done at both Gettysburg and Antietam to restore the battlefields to what they wold have looked like in the 1860s.


Even on a bright sunny spring day the Sunken Road, or Bloody Lane, was a bit eery.


Does this photo look familiar? It looks peaceful now but this is what it looked like shortly after the battle.


We ended our tour of Antietam with a visit to Burnside's Bridge.


I made a side trip to the Needle and Thread while I was in Gettysburg. I splurged purchased one of their crinoline cage kits. I've wanted one for a while now and have heard nothing but good things about them. I also couldn't resist leaving the store without some mustard yellow wool for a new 18th century gown. :)

Wednesday, March 20, 2013

Crunch time and some resources

Hello all,
It's crunch time for this little seamstress. I have to admit, I don't know if this dress is going to get finished in time. I have a sneaky suspicion I'll be doing some sewing in the car. Still need to cut out my sleeves, cuffs, and collar. Also need to hem the skirt. I finally found my corset, which by the way was in the last place I looked go figure, so I was able to finish fitting the bodice last night.

I thought today I would share a couple resources for those of you interested in women's fashions of the 1860s. In particular American women during the Civil War, 1861 to 1865. I have an album on Pinterest with lots of photos and links to original garments.

First up, Who Wore What?: Women's Wear, 1861-1865 by Juanita Leisch. Since its publication in 1995, the book has become very popular with re-enactors and is a great resource who those just started out in the hobby or for those who want to gain a general knowledge of the time period. It also includes descriptions of accessories and construction tips for those interested in making there own clothing. No patterns, just wonderful photos.


 Juanita Leisch's book is the result of her study of 1860s fashions depicted in cartes de visite, or CDVs. Her book is organized into sections by clothing types - coats, day dresses, ball gowns, underpinnings, etc., and emphasizes the difference in fashion between young women, middle-aged women, and older women. The photographs, there are over 300 of them, show what real women actually wore to the photographer - not the fantasy dresses of Godey's Lady's Book. What I like is that the author tries to dispel some of the miss truths about women's clothing and shows what styles were most common for women in different age groups. There are exceptions to every rule, but as a re-eanctor myself, I like to represent someone from the main stream population. :)

Who Wore What? is available on Amazon but I was rather surprised at the price. Over $50 for a used copy and over $100 for a new one! Ouch! I received my copy as a graduation present about 10 years ago, pretty sure it was under $50 then. I'm not sure I would pay that much for it now. Inter-library loan would be a good option for this book. Don't pay too much attention to the not so nice reviews of this book - some people claim the book is too general, others say the author say no idea what she's talking about. I really can't say anything negative about this book, aside from the current sale price of course. Do keep in mind though, that this book is meant as a general overview of women's fashion and is not an in depth study. It's a good starting point but if you really want to get in depth combine it with other resources. Such as ...

The Way They Were Dressed in 1860-1865 by Donna Abraham. Available on Amazon and at Abraham's Lady. Don't let its small size fool you. This is an outstanding collection of CDVs, nearly 600 of them and all American. Like Who Wore What? its broken into sections. Unlike the previous book, it includes fashions of infants, young boys and girls, and men. It's nice to see the guys getting some attention. All too often the men are left out of clothing books and that's a shame. There are also some interesting group photos in this book.


Last but not least ...
The Way They Were Dressed in 1860-1865 Volume 2 by Donna Abraham. This is a new release. If it's as good as volume one then I will be adding a copy to my library. I plan on stopping at Abraham's Lady this weekend to take a look!


That's all for now. I'm leaving for Gettysburg tomorrow so I wont be posting anything for a few days. Hope you all have a wonderful weekend.

Monday, March 18, 2013

Where do these crazy ideas come from?

As I mentioned in Friday's post, I'm planning a trip to Gettysburg, PA later this week. (Thank you to Cassidy at A Most Beguiling Accomplishment for sharing her 1864 hair images  Also, to Isabella of All The Pretty Dresses who has some lovely 1860s gowns posted on her site.) Over the weekend I got this crazy notion that not only did I need a new 1860s dress to wear, I could some how finish one before I left. Ha! Where do these crazy ideas come from? I don't really know but I started working on a new dress all the same.

First off, I'm being good and using fabric from the stash. The fabric is a light weight plaid cotton that I bought several years ago for the purpose of make a Civil War era gown. I don't have any pictures to share just yet, will take some tonight. The plaid is a nice combo of a brownish orange, blue, green, and white. Plaids were very popular in the 1860s and at $2.50 a yard it was hard to say no.

The inspiration for my new dress. Source- Possibly Ebay, I can't remember
So far I have the bodice fabric and lining cut and sewn together, minus the sleeves which I still need to cut. I cut three panels of my 45" wide fabric for the skirt. I stitched them together last night and started gauging them. Gauging is a form of controlled pleating which is commonly found in mid 19th century gowns, particularly washable everyday cottons. A gauged skirt is whip stitched to a waistband making it less bulky then a pleated skirt. Need to dig out my hoop and corset tonight so I can make sure everything fits. It's been quiet awhile since my last Civil War gown but I'm using an almost fail prove pattern drafted from one of my originals.

 Update 3/19/2013 - Just found this image which is a pretty good match for my plaid fabric. :)

Source
On another sewing note ... I finished my blouse for the Sew for Victory sew along using a 1940s mail order pattern. I used a dark blue cotton with white polka dots. Pictures soon!

Friday, March 15, 2013

Great Hair Fridays - The 1860s

In preparation for a trip to Gettysburg, PA. next week, I thought I would focus today on hairstyle from the 1860s.

One of the most common hairstyle was hair parted down the center of the head and pinned into a bun or chignon and the nap of the neck. Hair could also be confined with a hairnet. Notice that the hairnet pictured below is made of very fine material - not at all like the bright colored, heavy synthetic hairnets sometimes see at reenactments.
Source - http://www.bartoscollection.com/vehairstylesbyera/hairstyles2civilwar.html
Braids were popular and women often used false hair to achieve some of more elaborate styles, particularly for evening events such as going to the opera or a ball.

Source - http://www.bartoscollection.com/vehairstylesbyera/hairstyles2civilwar.html

This style pre dates the Civil War but was a style still favored by older ladies. To achieve the fullness at the temples, hair rats were pinned to the head and the hairs draped and pinned smoothly over the rats.

Source - http://www.bartoscollection.com/vehairstylesbyera/hairstyles2civilwar.html

The Ladies' 1860s Society has a page for 1860's hairstyle with pictures and step-by-step instructions.


http://gwtwscrapbook.blogspot.com/2010/07/beyond-chignon-part-1-civil-war.html#.UUNC_Td26Dc

Related Posts Plugin for WordPress, Blogger...