Showing posts with label Prom. Show all posts

Wednesday, June 11, 2014

Finished Breakfast at Tiffany's Dress for Prom

Hi All!  I'm back from the Reading, Pa airshow, what an awesome event!! I have so much to share but I want to get caught up with a few posts first. But before I forget, the winner of my surprise giveaway is ....

Brigid of the blog Boyer Family Singers! Congratulations! I will be contacting you soon :)

I have projects to share as promised. :) Today I have some photos of the Breakfast at Tiffany's dress I finished back in May for my friend Abby. You may recall the first post where we played with the pattern to get just the right look.

I first couple photos are ones I took with my cell phone so they are not all that great. (I have a new camera now so going forward photos will be much better!) The photos of Abby wearing the finished dress at prom were taken by someone else.

The final mock-up of the bodice back.
This photo, although very washed out, shows the finished front with some options for jewelry.


The finished back.
There were a few minor adjustments to make last minute, such as taking the bodice in a little more, but I think in the end it fit pretty well. Using my mom's sewing machine I was able to serge all the seams making the inside of the dress much neater. The fabric, although nice to work with over all, did fray quiet a bit.

Abby looks fantastic, don't you think?

Photo by Kate Garaffa

Photo by Kate Garaffa
 I love how the back of the dress turned out. :)

Photo by Kate Garaffa

Tuesday, May 6, 2014

Breakfast at Tiffany's Dress for Senior Prom

Hello everyone! Thank you all so very much for your wonderful comments here on my blog, on Facebook, and on Flickr about my Sew For Victory dress. I was floored by how well it was received. Thank you! There are little things here and there I would like to change (most obviously a longer slip is needed!) but over all I'm very please with it. Cori and I are going to a big WWII event in Pennsylvania next month and I'm planning to bring this dress along. :)

I posted briefly on my Facebook page a few weeks back about a new sewing project. Now that my Sew For Victory dress is finished I have started to work on a prom dress for my friend Abbey. Some of you may remember the blue and silver lace prom dress I made for my young friend Jen. You can read all about the construction and see the final pictures in my posts here.

Abbey wanted something different and really special for her senior prom. So when she asked me about helping her create this particular dress I was super excited. I will be creating a version of the famous black dress worn by Audrey Hepburn in the 1961 movie, Breakfast at Tiffany's. As part of my research on the dress I'll have to watch the movie, again. Oh darn. ;)

Audrey Hepburn as Holly Golightly in Breakfast at Tiffany's - source
Source- Christies
 The original dress sold at Chrisie's a few years back. Here are a couple photos I found of the dress on display at the FIDM Museum and Galleries. Audrey's wardrobe for Breakfast at Tiffany’s was designed by couturier Hubert de Givenchy. In 2011, the FIDM Museum and Galleries held a special exhibition to celebrate the fiftieth anniversary of the movie. On display were recreations of Givenchy’s little black dresses worn by Audrey in the movie Breakfast at Tiffany’s.

Little black dresses designed by Hubert de Givenchy for the movie, Breakfast at Tiffany’s - Source
I first looked through my patterns to see if I had anything that would work as a base pattern. When that failed I searched online. Right away I knew that what ever pattern we picked would need to be altered to create that classic back. Below is the pattern I'm working from, Butterick 2460. It has the same gathered waist and an almost identical bodice. The skirt, obviously, will need to be lengthen but that should be easy. Another change will be to move the zipper from the center back to the left side.

Butterick 2460
Butterick 2460
Here is the progress so far....

The first step was to cut out and baste a mock up of the bodice straight from the pattern with no changes. I wasn't sure about the size so I wanted to get a good idea of those alterations first. There are two sets of darts to the front, and as was common with late 1950s and early 60s patterns the bust area is rather pointy, for lack of a better term. We going to see if we can smooth it out a little bit. After fiddling with the darts for a bit I begin drawing the new back.


The original back neckline will more or less become the bottom of the 'U' shape that connects to the shoulder straps. Next I used a marker - for some reason orange was all I could find - to draw the cut away sections, making sure to leave a portion of the center back attached to the center of the 'U'. Here's what it looked like.


I cut the front neckline a touch lower and had to adjust the arm holes as well. Here is the "new" back mock up. I need to remember to give myself a little extra material at the center back where the point meets the U. The plan is to keep the back all one piece. I'll be lining the bodice as well as using some interfacing to help the back keep it's shape.

Need to add a bit more fabric to this center section of the back.
Here's what the final mock up of the back looks like. The black marks indicate the back darts and adjustments needed for the side seams.


That's it so far. I'll work on adjusting the skirt to work with Abbey's measurements and gather my supplies for the actual dress.


This project is perfect timing as I just learned that the blog Rhinestones and Telephones has launched the Hepburn Hepburn Project. :)

Friday, June 1, 2012

Prom Night! - Jenn's Finished Dress

I finally have pictures of Jenn in her dress! Ok, so prom was actually two weeks ago, but hey better late then never right? I can't take credit for the photos, just the dress. ;) You can see additional photos and read about how the dress was made here.


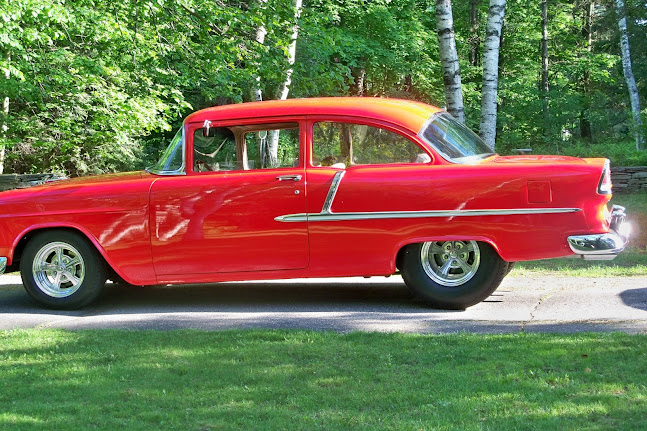
The prom was held at the Hartness House Inn. This year's theme was "Starry Night." Jenn and her date arrived in style in a classic car and walked the red carpet.


The photo to the right was taken inside the Hartness House Inn. It's a little washed out but I think it shows the actual color of the dress rather well. In some of the photos taken outdoors the dress looks purple. It's really a dark royal blue.

Jenn sent me a Google+ link with tons of pictures but sadly I can't show them all. I think these last two are my favorites of the bunch. It sounded like everyone had a great time! Sort of made me wish I could go to prom again! Maybe one of these days I'll dig out photos from my junior and senior proms to share.

I really enjoyed working on this dress as was so excited to Jenn wear it. She looked stunning. Looks like I might be making prom dresses next year as well.


Wednesday, May 16, 2012

Prom Dress Finished at Last!

After several weeks of sewing and fittings, the prom dress I have been working on for my friend Jenn is finally finished! And just in time too, her prom is this Saturday. 

My Vintage Visions vintagevisions27.blogspot
Detail of bodice front
The dress pattern was Simplicity 3784, view C with a few modifications - Straight neckline to a sweetheart neckline, a lower, scoped back, and the addition of lace on the bodice. Here is Jenn’s sketch of the modifications (in red) and placement of the lace (in purple). Jenn purchased the dress fabric and lining material. The silver lace came from my stash.


Making the modifications to the pattern pieces was pretty simple to do. After cutting and fitting a muslin mockup, I took the piece for bodice center front, which was cut on the fold, and drew a curved line along the top edge from the side front seam to the center front. Then with the bodice center front folded in half, I cut along that line. A pretty sweetheart neckline in one simple cut! 

My Vintage Visions vintagevisions27.blogspot
Bodice front with all the lace stitched in place
The modifications to the back of the dress proved a bit more challenging. The back of the dress was fairly low to start with but Jenn wanted the center back scooped a little more. We found that removing a large portion of the back caused the bodice to “gap” in the back. The pattern called for boning in all of  the bodice seams but I wasn’t sure it would be enough to keep the dress in place. Fearing a possible wardrobe malfunction, the solution was to add some kind of tie across the center back to help pull the bodice together.
 
My Vintage Visions vintagevisions27.blogspot

I cut a piece of lace but quickly realized it would not be strong enough on its own. Feeling pressed for time and wanting to find a quick fix, I attached some clear elastic to the lace. This might have worked ok, but I’ll never know for sure because I accidentally melted the elastic with the iron and ruined the piece of lace. Argh! So solution # 2, which is what I should have done the first time, was to cut a new piece of lace and attach some interfacing to it. I added a length of shear ribbon behind the interfacing to give the whole piece more strength. 

Lace for center back of dress

Lace for center back of dress with the elastic ties before I melted them with the iron
The directions for assembling the dress were straight forward. The pieces for the dress and dress lining were assembled separately with the boning sewn into the bodice lining. The lining and fashion fabric were then placed right sides together, sewn along the top of the bodice and turned right side out. I added the lace to the fashion fabric before joining the dress to its lining. The bottom edge of the lace was tacked in place during one of the fitting sessions. Oh, and there is a zipper added to the back at some point along the way. Did you know you can hold your clothing together with something besides buttons and pins?!? That's nonsense! :) The vast majority of my sewing projects have been pre-1930s so I really can’t remember the last time I to put a zipper in something.

Overall the pattern was easy to work with and the directions were clear. I had to pin and baste the heck out of the fabric though because it was so slippery! Linen and wool are so much nicer to work with. Good thing I had my new dress maker's pins. Looking back on the project I can see a few things I would have done differently but I'm pretty happy with the final results. The dress looks great on Jenn and I can't wait to see her and her friends all dolled up at the Grand March on Saturday.


 As with any sewing project it's important to have proper feline supervision. This is Simba who's specialty is "holding your fabric down" and stealing the pin cushion.

Friday, April 20, 2012

Will Steinman Original - Vintage Prom

I'm taking a little break from the 18th century to focus a bit more on other interests. Not to worry, I'm still working on that new 18th century gown which will (hopefully) be finished soon. I will also continue researching for my posts on portrait miniatures of British soldiers.(Part one and two.)

Today's fun vintage finds are a selection of Will Steinman prom and cocktail dresses from Vintageous. Gorgeous! I love all the layers of tulle!


Vintageous
Will Steinman Original was a formal dress company that specialized in making prom, formal, debutante and wedding dresses. The company was active from the 1920s through the 1960s. A signature feature of Will Steinman that I have seen so far is a wide waistband often accompanied by a large bow/sash.

Search online for "Will Steinman Original", "Will Steinman vintage" or "Will Steinman dresses" and you will find an array of fluffy brightly colored gowns!

Vintageous


Vintageous

Vintageous

Vintageous

Related Posts Plugin for WordPress, Blogger...