Thursday, July 3, 2014

WWII Cotton Blouse & Linen Slacks

Back at the beginning of June, Cori and I traveled to Reading, Pa to the Mid-Atlantic Air Museum for a WWII event. I talked a little about it in my last post where I shared with you my Red Birds Dress. That was my outfit for day one. Here is what I wore on day two! We had so much fun and met so many great people.

Another staff car photo! I was trying to recreate this photo from last fall.
First up the fabric and the patterns. The blouse is made from Hollywood 1530 using 100% cotton with a cute retro style print. I'm not sure if it qualifies as a true 30s/40s print but I think it's pretty close. Plus I liked it best out the options I had in the stash. Actually, this came from my mom's fabric stash, as did the fabric for this year's birthday dress and red bird dress. There should be an extra 2 inches of fabric on either side of the blouse fronts but I didn't have enough fabric. As you can see looking at the pattern pieces laid out it was a tight squeeze! Surprisingly this didn't have a huge impact on the fit of the blouse, I feared it might turn out too small but it was just fine. The only other change I made was to add a second pocket, but really that was because I accidentally cut two pocket pieces and didn't want to waste the fabric!

Sadly, the short sleeve piece is missing from this pattern. I replaced to using the short sleeve pattern piece from McCall 3306. (There is a copy of this pattern for sale here.) Both patterns are late 1930s so I felt this was a good substitute and I really like the little pouf that McCall 3306 creates at the top of the shoulder. It's one of those little details that I love about the 1930s and early 1940s. :) The green fabric you see is the same as my 2014 Sew For Victory dress. There was juuuust enough to make a blouse with the remainder of that fabric as well.
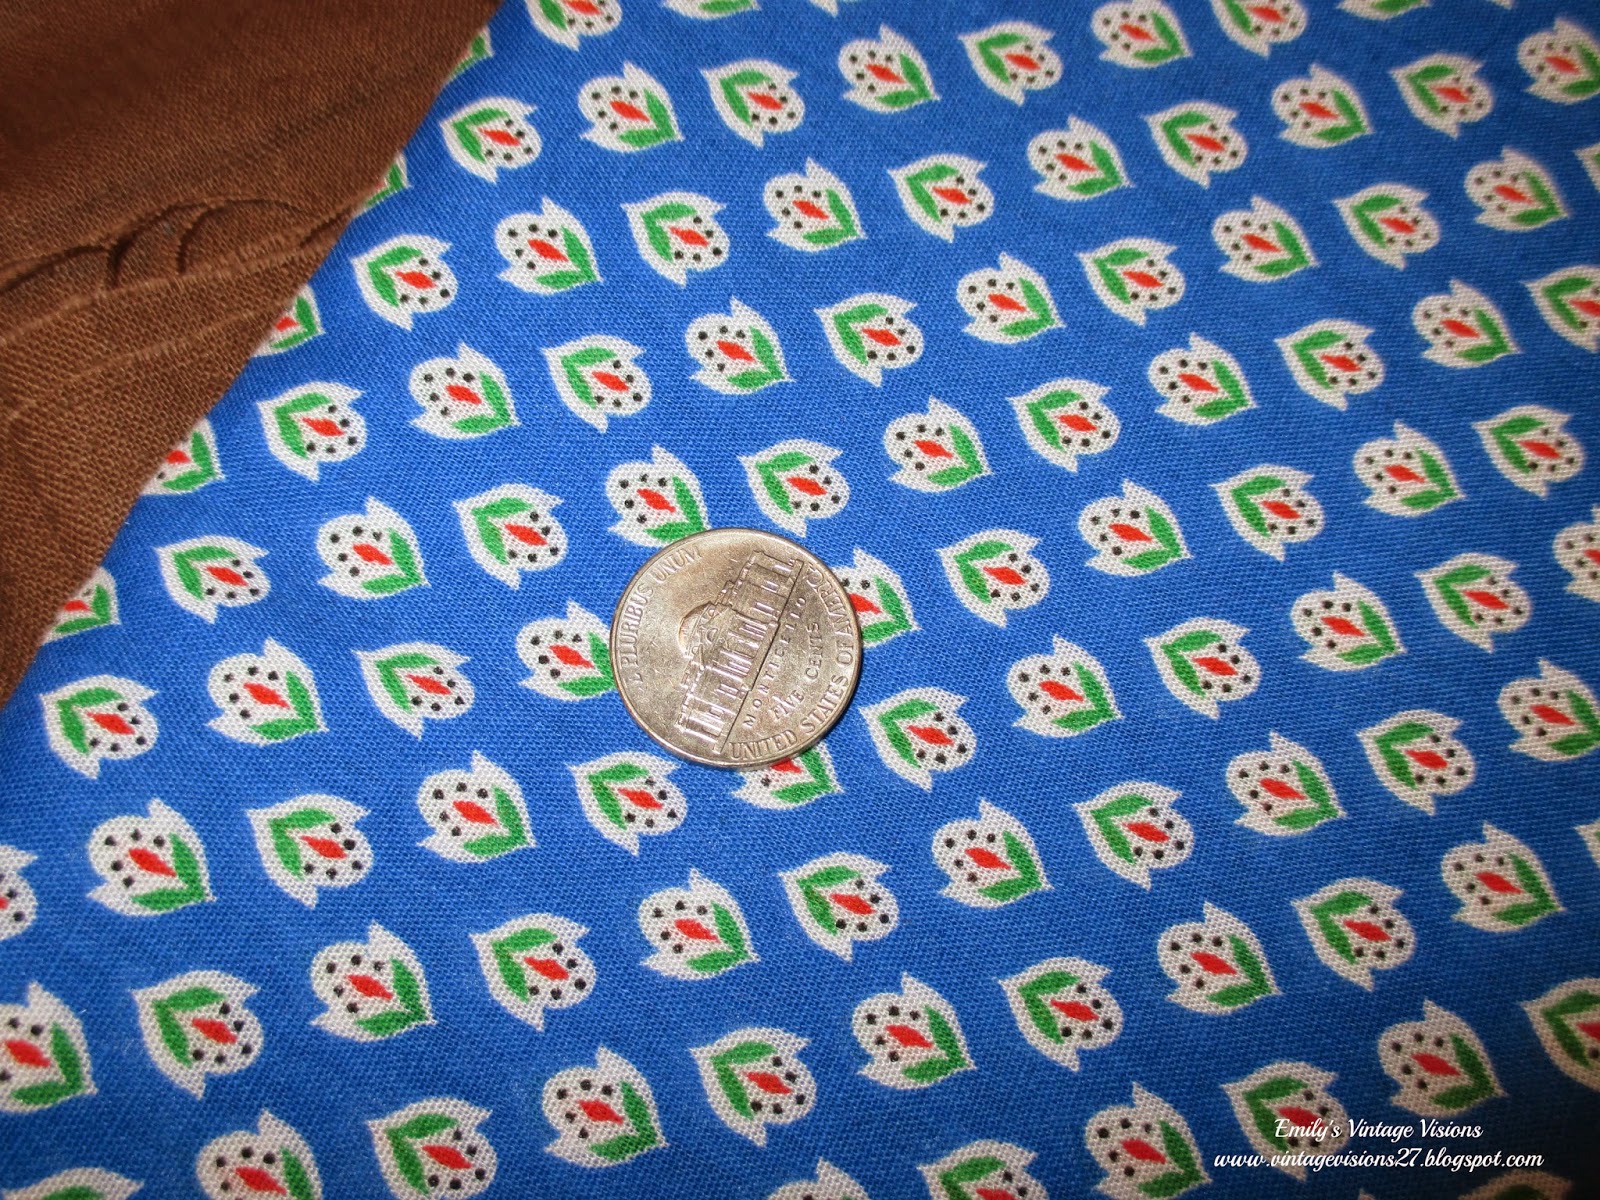

Getting ready to cut! Always the scary part. :)
Here you can see the part of the blouse center front that I had to eliminate.
Summary of the Pattern
Fabric: Blue cotton from the stash
Pattern: Hollywood 1530
Year: late 1930s or early 1940s
Notions: Thread and buttons from the stash
How historically accurate is it? Very! The fabric is pretty close to period prints. The buttons are modern but look just like vintage ones. I'd give the blouse a 9 1/2 out of 10.
Any tricky parts to the pattern? Button holes.... enough said
Did you change anything? Not much. The short sleeve piece was missing so I used one from a different pattern I added a second pocket because I cut an extra one and didn't want to waste the fabric. I didn't have the exact amount of fabric so the finished blouse is a touch shorter and narrower but still fits great.
Time to complete: Around 8 hours I think
First worn: June 2014
Total cost: Everything but the pattern came from the stash, so less then $5!
Notes: Love this blouse. I need more separates!

The slacks were made using Simplicity 1306 and linen left from an 18th century project. There is a discount fabric store near by that occasionally gets 100% linens and wools. I stop in every once in a while to see what they have. It's one of those places, like a thrift store, that if you see something you like you'd better buy it because there's a good chance it will be gone soon. I tend to "stock up" when I find good linens and wools there.
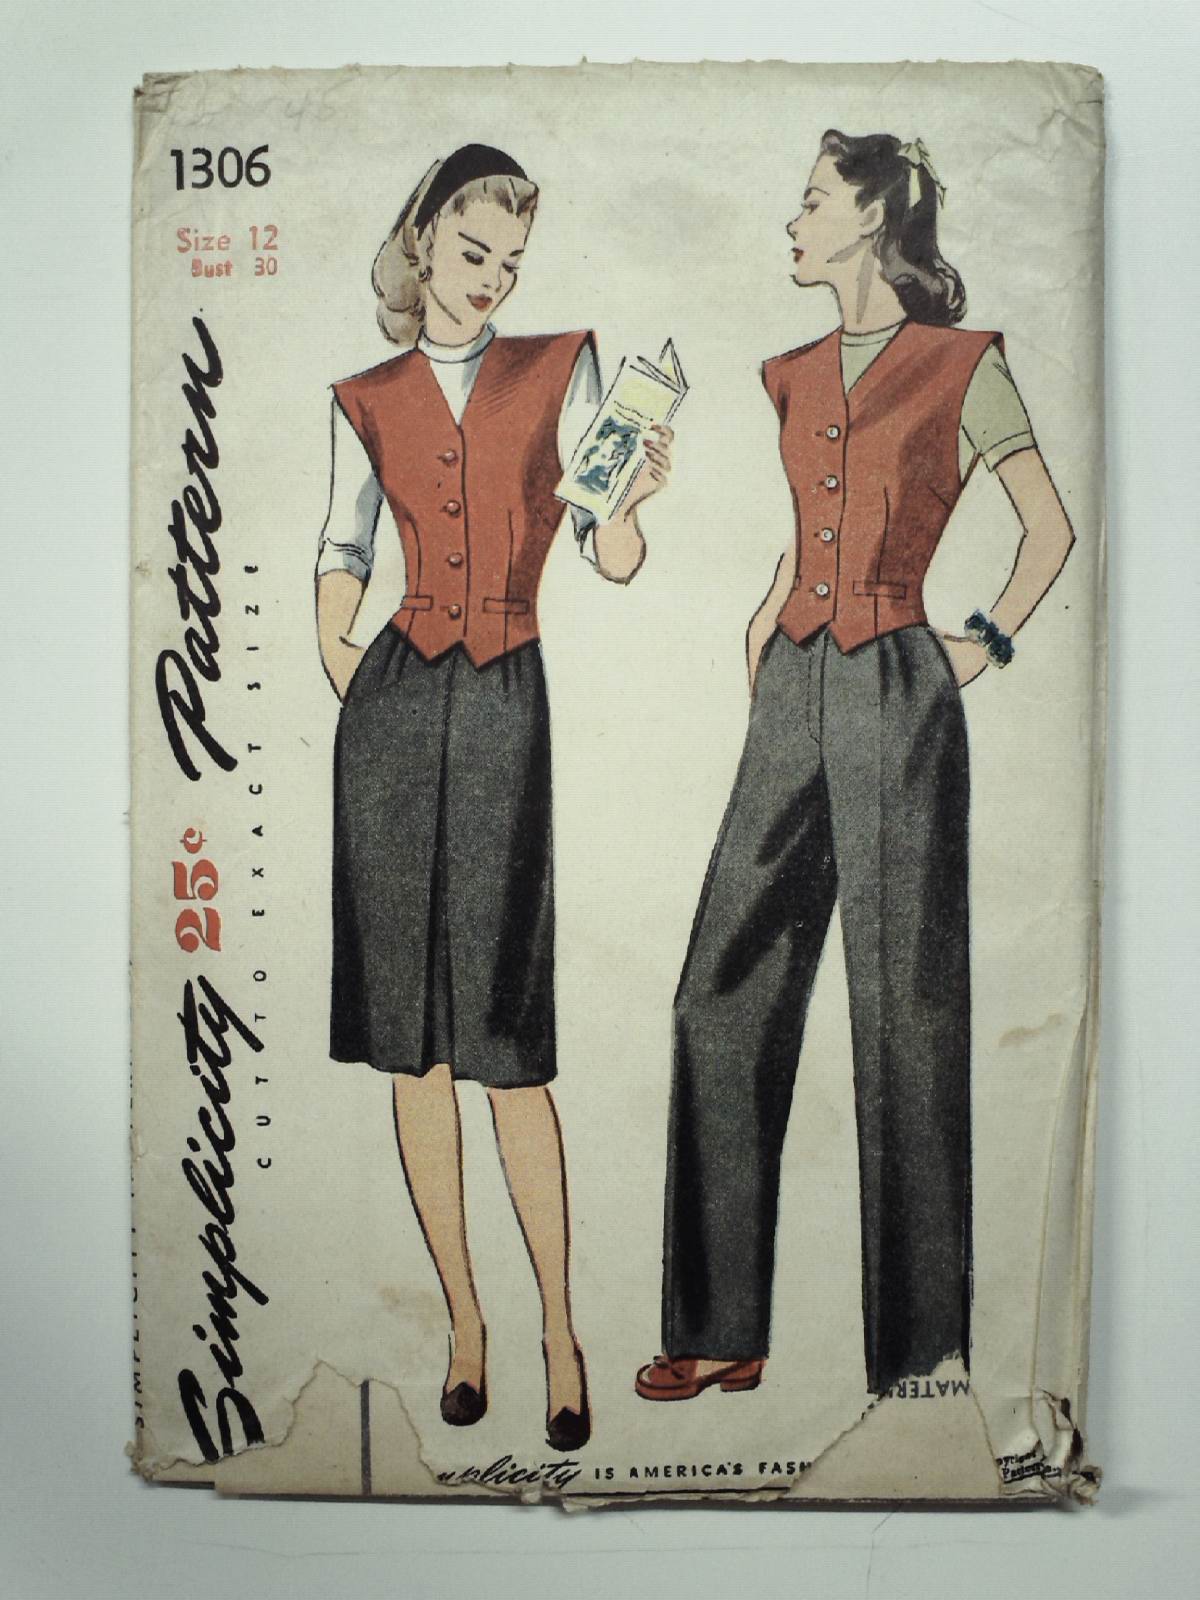
40s -Simplicity Pattern No. 1306- Womens skirt, slacks and vest. The skirt and slacks are fashioned with trouser pleats at front waistline, darts at back waistline and vertical pockets at either side. A center front inverted pleat trims the skirt front and the skirt back is seamed down the center. The slacks have a fly opening secured with a slide fastener. Welt pockets trim the dart fitted vest which features extended shoulders and a four button front closing.
Simplicity 1306
I find the fit of Simplicity 1306 is much better than Simplicity 3322 (reproduced by Eva Dress and the Vintage Fashion Library). I used Simplicity 3322 to make a pair of slacks last year for Sew For Victory but was never very happy with them. Although both patterns are very similar in cut and style the main difference, other than a zipper front and side opening, is the treatment of the slacks front. Simplicity 3322 has front darts where Simplicity 1306 has small pleats. Both patterns have darts in back. Slacks from the 40s are meant to be baggy but sometimes this style can be really unflattering. I found that by extending the length of the front pleats a little more helped create a smoother fit Next time I use this pattern I will need to make some minor adjustments to very top of the slacks and waistband. I ended up making two small tucks in the waistband so the slacks would stay where they needed to at my natural waist.


I completed my look at day with a red scarf, victory rolls, and my Army/Navy E-award pin and another WWII era victory pin. You can see close ups of the pins here.

I really wish I good recommend the vendor who sold me the sunglasses I'm wearing, but sadly I cannot. It's a long story and not one that I want to go into detail here. Let's just say the costumer service started great but ended poorly. The glasses don't fit as well as I would like them to and I can really only wear them for short periods of time.


Summary of the Pattern
Fabric: Brown linen left from another project
Pattern:
Simplicity 1306
Year: 1940s
Notions: Thread, zipper, and buttons from the stash
How historically accurate is it? Very! I'd give the pants a 9 1/2 out of 10.
Any tricky parts to the pattern? Button holes and zipper placket.... enough said
Did you change anything? Not much. The pattern needed to be shorten, no surprise there. I also needed to take them in at the waist.
Time to complete: Around 10 hours I think
First worn: June 2014
Total cost: Everything but the pattern came from the stash, so less then $15!
Notes: Love these pants. I need more separates! I need to make them a touch shorter next time but I will be using this pattern again. :)

By the way, I'm having another sale on Etsy. Use the coupon code FLASHSALE to save 15% until July 5th. I'll be adding some more items after the holiday weekend.

Tuesday, July 1, 2014

New Dress - Red Birds, Red Buckle, Red Buttons

As I mentioned in an earlier post, Cori and I attended a huge WWII event in Reading, PA the first weekend in June. Each year the Mid Atlantic Air Museum's holds an enormous air show and WWII reenactment. We have several friends who go just about every year and have been telling us it the event to go to on the East Coast for WWII living history. Just how big is this event? Well, we spoke with one staff person about the number of military vehicles that were there. He said out of the registered vehicles there were about 100 jeeps! There were of course more then that. Also all kinds of trucks, motorcycles, etc. And of course the planes! Seeing these war birds up close and personal, it doesn't get any better then that! (You can see an overhead view of the event site here.)

My 1940s "Red Birds Dress" using McCall 5724.
Photo in front of the war bird B-25J Mitchell WWII bomber "Briefing Time"
While I have a fairly decent selection of actual 40s clothing I can wear, recreating pieces from my vintage patterns just seemed the way to go for this event. I knew that I would be outside walking around all day and most likely would not have to opportunity to run back to the hotel and change in the case of bad weather. I did bring several vintage pieces with me just in case. If you are following me on Facebook you will have seen my 40s novelty "fan print" dress. Don't worry, there will be a post about it. :)

This spring, between Sew For Victory and planning outfits for this event, I spent some time going through my fabrics to organize and see what I had. Some fabrics lend themselves to a variety of sewing projects for different time periods and some are best suited for only one. For example, many of my fabrics are great for vintage or modern sewing but are NOT good for anything 18th/19th century. Fiber content and print being the biggest reasons. I try to organize my fabrics by what I plan to do with them. Historical sewing (18th/19th century appropriate fabrics) vs. vintage/modern sewing. Obviously there is a lot more freedom is choosing a fabric for my vintage/modern sewing projects. :) But sometimes there are fabrics that can be used for just about anything. In my next post you'll see the 1940s slacks I made using linen that was left from an 18th century project. 

What I'm calling my "Red Birds Dress" was another "limited fabric so cut carefully" projects. Like my recent birthday dress, this fabric came from my mom's sewing stash. Although it's cotton she decided it wasn't suitable for quilting. This fabric had been waiting quietly in the vintage/modern stash for just the right pattern to come along. Because it was just shy of 3 yards and only 32 inches wide, I knew I would be somewhat limited as to what I could do with it.

McCall 5724 was purchased with a small group of patterns. I was a little unsure about it at first but it's one of those patterns that I find myself drawn to every time I go through my pattern box. Maybe it's the beautiful cover illustration or maybe it's the cute details of the bodice. I can't put my figure on it but I just knew that this was a pattern that deserved to be used! I hesitated at first to use this fabric for a 1940s dress. But then I found this same print in a green colorway somewhere online and it was listed as 1940s fabric! I'm kicking myself because I didn't save the picture. And of course I can't find it now. (If someone finds it please let me know!) The more I thought about the fabric the easier it became to picture it made from McCall 5724.

McCall 5724. It has pockets!
I chose View B, without the ruffles. I spent a good amount of time placing the pattern pieces on the fabric. The bodice was a bit tricky for a couple reasons. First the sleeves are cut in one with the bodice. Second the front is made of two pieces which include material for the front facings. A little odd to explain but if you look closely at the pattern cover you can see that the dress buttons down the front. The extra material is folded back to act as a facing for the buttons and button holes.  

Getting started...
Bodice back
The back of the bodice is fitted with small darts. The front is fitted with small darts and shearing at the shoulders. Four rows of gathering stitches were made then each drawn up to fit between the corresponding marks on the pattern. The edges of the bodice front pieces are lapped and the top stitched in place.You can see those details in one of the photos below.

The almost finished dress.
A little white back I was asked to share where I find my buckles. I wish I could tell you that I have some amazing secret source for these buckles, but I don't. I'm sure you've spotted a few of them on my blog before. (Here for example.) A few years back I made a lucky find at a local antique/junk shop where I was able to purchase about a dozen vintage buckles for a round $1.00 each. They were tied together in a neat little bundle. Some are 70s/80s vintage but most are much earlier. There were a few plastic ones, possibly Bakelite or Lucite but I'm not sure, like the red one above and a few shell ones too.

The buckle and buttons used for this project are actually the same ones in this photo that obviously I didn't end up using with that particular dress. Can I just say how incredibly hard it was for me to remove these buttons from their original card? Not physically of course, they popped right off. But because they were NOS (new old stock). I'm happy I used them because I really think this was the perfect project for them!

Vintage "Glamour Girl" buttons pinned in place. Also a good look at the lapped seam and shoulder shearing.
Vintage Buckle!
So here we go, the finished dress! I wore this for the first day of the airshow. My accessories are all 40s vintage except for my shoes which are Aris Allen 40s style repros from the Dance Store. I wore them for two days straight and found them to be very comfortable.

B-25J Mitchell WWII bomber "Briefing Time"

This is the only photo I have of the back of my hat.

B-25J Mitchell WWII bomber "Briefing Time"

All reenactors had to wear id bracelets so that's what that funny blue thing is around my wrist. BUT you can also see my Marine Corps sweetheart bracelet. :) Thank you to Voon Chew for taking and allowing me to share these last two photos!

Photo by Voon Chew
Photo by Voon Chew
Pattern - McCall 5724
Fabric - Mom's fabric stash
Buckle and Buttons - My stash
Shoes - Close out from Dance Store .com
Hat - Etsy
Gloves and Purse - Thrifted
Sweetheart Bracelet - Brimfield Antique Show
Lipstick color - Red Velvet by Bésame 

Summary of the Pattern
Fabric: Vintage cotton print
Pattern: McCall 5724
Year: 1940s
Notions: Buttons, buckle, thread, fusible interfacing, zipper.
How historically accurate is it? Not to brag, but I'd say 10 out of 10! Everything but the thread and interfacing for the belt is 40s vintage. :)
Any tricky parts to the pattern? The button holes. I dislike them but I'm getting better the more I do. The bodice was a bit tricky but after studying the directions I figured it out and it went together pretty well. 
Did you change anything? Surprisingly, no
Time to complete: About a week
First worn: June 2014
Total cost: All the materials were from the stash! Yeah! I think I paid around $10 or $12 for the pattern.
Notes: Looking at these pictures, I think I should shorten the skirt just a little bit. 

Wednesday, June 25, 2014

Violets are Blue and Purple Birthday Dress

Another overdue post! But it's OK because there are lots of photos to make up to it. I call this my "Violets are Blue and Purple Birthday Dress." It was finished just in time to wear for my birthday outing the last week of May. The dress was made from two different vintage patterns. The bodice was made using McCall's 8949 (from the 1950s) and the skirt from McCall's 5812 (from the 1960s).

A nice close up of the dress fabric.
McCall's 8949 and McCall's 5812
The fabric came from my mom's sewing stash. As a quilter she has an ever growing pile of fabrics to pick from for her projects. Many fabrics are gifted to her but not all are suitable for quilting. This was one of those fabrics. You'll see some more in my upcoming posts. If you look carefully at the picture below you can see some light staining on the fabric, probably from storage. It mostly came out in the wash. The marks were difficult to cut around but are not all that noticeable on the finished dress.


Here you can see the pieces for the bodice. My fabric for this project was limited so I had to cut carefully. If I had more fabric to play with I could have done a better job of matching up the print.


And here is the finished dress! I had the perfected lavender/blue colored crinoline to wear with this dress but because it's very short and full ( it was made for square dancing) it looked really funny underneath. There is a really good post here showing the difference between true vintage crinolines/petticoats and those made for square dancing.


For my birthday each year, Cori and I travel to one of our favorite antique shops in Quechee, Vt. The ladies who work there recognized us right away from previous visits (like last year's trip) and came over to chat. Afterwards we stopped for lunch and headed over to check out the Quechee Gorge. As you see we weren't exactly dressed for hiking so we only walked a short distance on the trail that leads down into the gorge.


You get the best view of the river below by standing on the bridge but I'm not one for heights so I didn't stay long. It didn't help that Cori was playing around and making me nervous.


It's sort of an odd family trait but two of my siblings and I seem to be able to find four leaf clovers where ever we go. I found all of these when we stopped for lunch. How many can you count in the picture below?


How many 4 leaf clovers do you see? :)
We finished the day with dinner and an ice cream Sunday at our favorite restaurant in town.


Summary of the Pattern
Fabric: Vintage cotton print
Pattern: McCall's 8949 and McCall's 5812
Year: 1950s and 1960s
Notions: Buttons, buckle, thread, fusible interfacing, zipper.
How historically accurate is it? Hard to say because it's two pattern used to make one dress.
Any tricky parts to the pattern? Fitting the bodice was tricky but it's hard to fit something on yourself without help. Once I worked out the fit issues the dress went together fast.
Did you change anything? Not really. I basically followed the pattern directions for pleating the skirt and the other directions for the bodice. Joining the two together was pretty straight forward.
Time to complete: About a week
First worn: May 2014
Total cost: All the materials were from the stash! Yeah! One pattern was free and I think I paid around $10 for the other.
Notes: If I had more fabric to play with I could have done a better job of matching up the print but I'm happy with it. Also I think the fit is still a little funky and could use some adjustment in the future.

Wednesday, June 11, 2014

Finished Breakfast at Tiffany's Dress for Prom

Hi All!  I'm back from the Reading, Pa airshow, what an awesome event!! I have so much to share but I want to get caught up with a few posts first. But before I forget, the winner of my surprise giveaway is ....

Brigid of the blog Boyer Family Singers! Congratulations! I will be contacting you soon :)

I have projects to share as promised. :) Today I have some photos of the Breakfast at Tiffany's dress I finished back in May for my friend Abby. You may recall the first post where we played with the pattern to get just the right look.

I first couple photos are ones I took with my cell phone so they are not all that great. (I have a new camera now so going forward photos will be much better!) The photos of Abby wearing the finished dress at prom were taken by someone else.

The final mock-up of the bodice back.
This photo, although very washed out, shows the finished front with some options for jewelry.


The finished back.
There were a few minor adjustments to make last minute, such as taking the bodice in a little more, but I think in the end it fit pretty well. Using my mom's sewing machine I was able to serge all the seams making the inside of the dress much neater. The fabric, although nice to work with over all, did fray quiet a bit.

Abby looks fantastic, don't you think?

Photo by Kate Garaffa

Photo by Kate Garaffa
 I love how the back of the dress turned out. :)

Photo by Kate Garaffa

Wednesday, June 4, 2014

Finishing Projects, Delays in Sharing

I've been a very bad blogger lately. I have been sewing like crazy for the last few weeks and have several finished projects but I have not shared them yet. Partly because I'm waiting for pictures from someone and partly because I've not had the time to upload my own pictures and create new posts.

Preparing to sew the pleats of the skirt for my birthday day dress.
 So what's waiting be shared?
- Abbey's finished prom dress. The construction post is here.
- My birthday dress! One construction picture seen above.
- 1940s blouse
- 1940s linen trousers
- 1940s red bird dress

Why so many 40s projects you ask? As I mentioned on Facebook, later this week Cori and I will be attending a huge WWII event in Reading, PA. It's the annual Mid Atlantic Air Museum's air show and WWII reenactment. We have several friends who go just about every year and have been telling us it the event to go to on the East Coast for WWII living history. While I have a fairly decent selection of actual 40s vintage I can wear, recreating pieces from my vintage patterns just seemed the way to go for this event. I don't mind wearing a 70 plus year-old garment for part of a day. But for this event I will be outside and moving around all day and into the evening (there will be a USO dance in the evening!). That's a lot of stress on an older garment, not too mention the added stress of sweat and environmental impacts like sunlight and dust etc. Don't get me wrong, I love wearing my vintage! I just like to save most items for special occasions and try to limit the amount of stress I put on them so they will continue to last. :)

I hope to have lots of photos to share sometime next week.

The back of Abbey's "Breakfast at Tiffany's" prom dress
With the exception of the first, I must apologize for the poor quality of the photos in this post. I finally have a new camera but I'm still learning how to use it. I used the camera on my cell phone to snap the other shots.

The awkward photo from Facebook of my finished 1940s blouse and trousers.
And a real teaser photo, the bird dress! :) You'll have to wait until after this weekend for pictures of the finished dress. Sorry. :) Everything for this dress came from the stash!! That's all for now. Off to finish packing.

Related Posts Plugin for WordPress, Blogger...